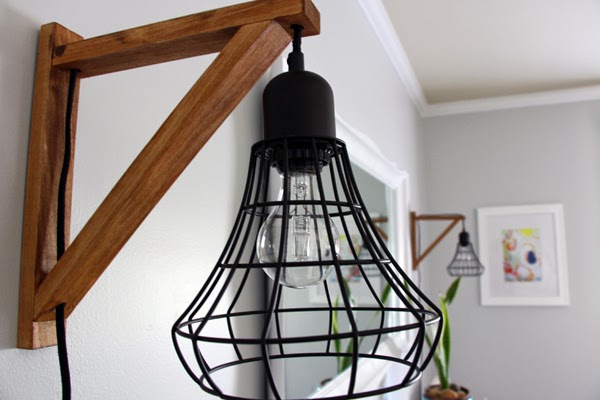
We essentially followed this tutorial from Nalle's House, except that we made our own brackets since we don't have an Ikea close by.
The cage lights are from Target.
As for the brackets...
We started by cutting a 10" piece and a 12" piece for each bracket from a 1x2.
We attached the 10" piece (the top of the bracket) to the 12" piece (the back of the bracket) with a screw leaving 1" of space visible at the top of the backside of the bracket.
The top one is oriented in the correct direction in this pic.
*Note: We later had to go back and remove this screw when we realized that it was in the spot where the hole for the cord needed to be drilled. We replaced the screw with a couple of brad nails.
Next, we measured and cut the pieces for the braces. We mitered both ends at 45 degrees as shown below.
We attached those with brad nails and then drilled holes for the cord. We then applied a coat of Minwax's golden pecan stain that we had on hand.
I decided that it was too orange and so we added a coat of Rustoleum's paprika stain. You can see the difference below on the front bracket - the left side has the paprika applied.
To attach the cage light, you have to cut off the plug so that you can feed the cord through the bracket and then rewire a new plug on the end. We used this one. Seth did the wiring so I don't really know how you do it. Sorry.
Then we just used some 3M picture hanging strips to hang them on either side of our mirror.
The stain that we used on the brackets ties into the bamboo roman shades and the cage design picks up on the design of the overhead light.
Don't judge. The drawers and kitchen items on the table are a sign of progress in the kitchen!
Just a few more projects in the dining room and it'll be complete!


No comments:
Post a Comment
Thoughts, ideas, suggestions...