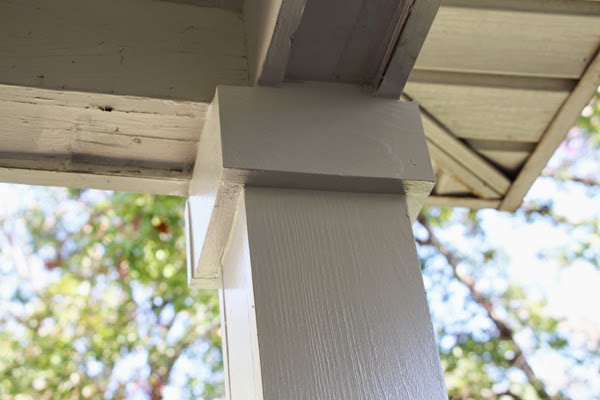
Next up for our new porch columns was adding some trim. This actually turned out to be the most time consuming part for us. We went with a simple design and used 1x4s to form squares at the top and base of our columns.
We started with the bases. We cut the side pieces to the depth of our column first and then measured so that the front and back pieces would overlap the ends of the side pieces. This ensured that there wouldn't be any visible seams on the front of the columns.
We used shims to try and get our trim as square as possible. (Yes - we are not professionals and there were large gaps. Caulk will fix that later. Just wait.)
The front and back trim pieces for the top were also cut from 1x4s.
At this point, we let our columns dry out for six weeks before we caulked, primed, and painted them. It is super important that you let treated wood dry before painting it or your paint will not stick.
Next, we liberally applied paintable interior/exterior latex caulk.
We made sure to fill every seam. And we probably should have done a second round of caulk to really hide them. But we're impatient.
We primed them with one coat of Valspar's exterior high hiding primer. Then we applied two coats of the same white paint the we used on our sidelights, Valspar's Duramax Exterior Semi-gloss paint in Ultra White.
Again, we should have spent a little more time on the sanding and caulking steps but most of the issues are only super noticeable close up.
I am so excited to check
We are now on the hunt for new sconces and then the front porch makeover will be complete. Let's look back in time...
(Why haven't I posted about eradicating our English Ivy yet? I don't know.
I will have to do that.)


columns look great! they really make the porch look fresh and updated!
ReplyDeleteNicee blog thanks for posting
ReplyDelete