Showing posts with label crafting. Show all posts

Sunday, May 10, 2015

DIY Reversible Wooden Sign

You may have noticed my wooden "bloom" sign in our kitchen tile reveal.  I actually made it over a year ago after being inspired by this photo of Kate from Farmhouse 38's sign.

There isn't really a tutorial and I didn't take any pictures of the process (sorry).  You simply grab a piece of plywood, scrap wood, whatever you have on hand and cut it down to the size you want.  I liked the angled edge that Kate had on hers and so I replicated that.  I stained it with Minwax's dark walnut stain.

Once I settled on a word, I typed it up in a Word document in a fun font and printed it out as a mirror image.  I used a heavy hand to go over the outline of the letters with a pencil before flipping it over and positioning it on my sign.  I used some tape to hold the printout in place while I traced the letters to transfer the outline of them onto the wood.  (I hope that made sense.)

Then I simply used the pencil outlines to guide me as I painted the word with some bright blue acrylic paint.

When Fall rolled around, I decided that rather than remove the sign and find new decor for the season, I would paint a different word on the back to carry me through winter.

I opted for the word "cozy" in a different font and chose a fiery red-orange paint color.

Now, I've got a reversible sign that I can leave up year round!


Monday, March 30, 2015

Spring Succulent Wreath

Being heavily pregnant with twins has left me with little energy these days so I'm seeking out quick, easy projects to decorate our house for Spring.  This succulent wreath fit the bill perfectly.


This was my initial inspiration.

Supplies:
  • grapevine wreath
  • faux succulents
  • hot glue gun
  • ribbon for hanging


I found my faux succulents at the dollar tree.  Yes - the dollar tree.  I ended up using 15 of them.  I had the ribbon and grapevine wreath on hand (it was also what I used for our 2013 Christmas wreath).

After removing the succulents from their pots and styrofoam "dirt", I liberally applied the hot glue on their stems, and stuck them in between the grapevines.  I added some green ribbon to the top and hung it on the front door.  Simple as that.


I am pretty impressed with the look of the dollar tree succulents.  


I also love the fact that this wreath isn't necessarily Spring-specific (i.e. no eggs, bunnies, etc). Since my life is going to get very busy in late Spring, it may end up gracing our door until Fall.

I hope the warmer temperatures and Spring weather make an appearance in your area this week!  Happy Monday!

Sunday, October 19, 2014

Easy Chevron Wood Slice Fall Wreath

I kept our fall wreath pretty simple this year.


I started with a straw wreath form (the same one that I used for our Spring wreath) and wrapped it with chevron ribbon that I found at Hobby Lobby.  


Seth cut me some thin (~1/4" thick) wood slices from a dead tree in our yard that I drilled holes in and connected with jewelry wire.


I used a wood burning tool to burn the letters to spell "fall" onto the wood slices.

I added a simple burlap bow and called it done.


The front porch isn't 100% finished for fall yet, but I'll post pics soon.  


Have a great week!

Thursday, June 19, 2014

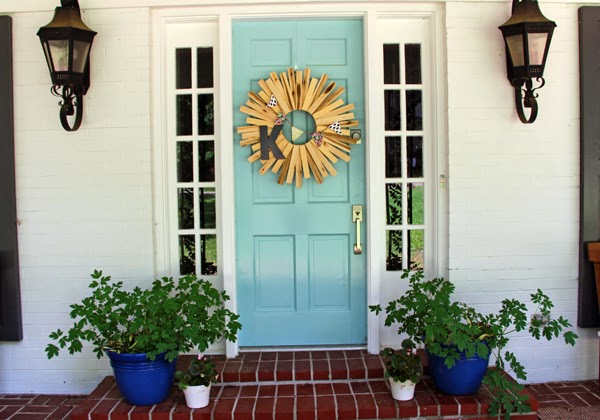
Wood Shim Starburst Wreath

Since the wreath I made for Spring has a bunny on it, I decided to make a new one for Summer (bunnies scream Spring and Easter only, right?).  Here is how it turned out.

I made it by hot gluing wood shims onto a foam wreath form in a starburst pattern.

I wrapped the wreath form in burlap first to help any exposed areas blend in.  I used a glass bowl in the center to guide the placement of my shims.  For my first layer, I left the shims as is. For the second layer, I used scissors to chop about 2" off the end of the shims before gluing them onto the wreath.


I picked up a cardboard "K" from Hobby Lobby and spray painted it navy blue.  (For those of you who don't know me personally and may be confused, my husband's last name begins with a K.)


Lastly, I made a simple fabric bunting using a few fun summery fabrics.  


It turned out a bit oversized for the door, but I'm too lazy to do anything about it.  I've moved on to other projects.  :)


Other than its generous size, I love the way it turned out.  It definitely adds some pizazz to our door for Summer.


Are any of you tackling Summer craft projects?

Sunday, March 23, 2014

Colorful Fabric Bunting Spring Wreath

Spring is officially here.  To celebrate, I finally got around to making a Spring wreath for our front door.


I wanted something inexpensive, fairly easy to make, and colorful with a nod to the season.


I simply cut strips of my gold polka dot burlap (from Joann's if anyone is hunting for some) and wrapped them around a straw wreath form (I left the plastic on for ease of use).  I used thumbtacks at the beginning and end of each strip to hold them in place.


Inspired by this, I made some bunting using twine and torn strips of fabric.  I had some on hand and picked up 1/8th of a yard of a couple other colors.  Even 1/8th of a yard was more than enough (I got two strips out of 1/16th of a yard).  


To make the rabbit, I traced an image from Google onto some scrap 1/4" plywood and Seth cut it out with our jigsaw.  I then slapped a couple of coats of grassy green acrylic paint on the front of it.  To secure it to the wreath, I found a couple of bamboo skewers in our kitchen cabinet and attached them to the back of the rabbit with super glue.  Then I just pushed him down into the straw wreath form.  (You can see one of the bamboo skewers in the photo above - I couldn't get him as flush with the bottom of the wreath as I intended.)


The new wreath adds some extra color to the front porch for Spring.  


And I don't think you can go wrong with a cute little wooden bunny.  


I'm still making decisions about outdoor pillows.  I just can't seems to find the right combination.  However, we are making progress with the new headboard for our master bedroom.  

Happy Spring!

Saturday, February 15, 2014

A Quick Mason Jar Pincushion and Blog Improvements

Now that I'm a sewer (yes, I'm using that term very loosely), I needed somewhere to stash my thread and straight pins.  When I saw this tutorial on Pinterest, I knew it would be perfect.


I was able to put it together in less than ten minutes with things I already had in my craft closet.  I used a fabric sample I had ordered from Spoonflower awhile back.  I cut it into a circle and sewed a simple running stitch around it before stuffing in a small piece of foam wrapped in batting.  I placed the lid on the bottom and pulled the thread tight before tying it off.


I didn't hot glue my fabric to the lid and I skipped adding the felt circle to cover the raw edges of the fabric.  If I was giving this as I gift, I might have made the extra effort, but I decided it didn't matter that much to me.  I think it turned out so cute.  When my collection of thread gets larger, I may have to make a second one.

Ok.  On to the second topic for this post…

BLOG IMPROVEMENT!

Long time readers have witnessed at least one "blog redesign" around here.  I put that in quotations because when I "redesigned" the first time, I was still using standard Blogger fonts and layouts.  Although it was definitely an improvement over the original look, the blog was still too generic for my liking.  I knew nothing about HTML or CSS coding and had no idea how to make my blog look the way I wanted it.  

So, I started reading and after some trial and error I was finally able to change my blog title font to something fun and more "me".  You may have noticed that I also found a code to center my blog title, my post titles, and the date of the post.  I also found a code to get rid of the pesky border that Blogger places around photos.  There are still some things that I'd like to improve, but I'm pretty happy with the new design.  

I'm also going to start resizing my photos before uploading them to the blog.  This should help the site load more quickly.  I haven't decided yet if I will continue to watermark them.  

I'm open to feedback and suggestions!

Tuesday, January 14, 2014

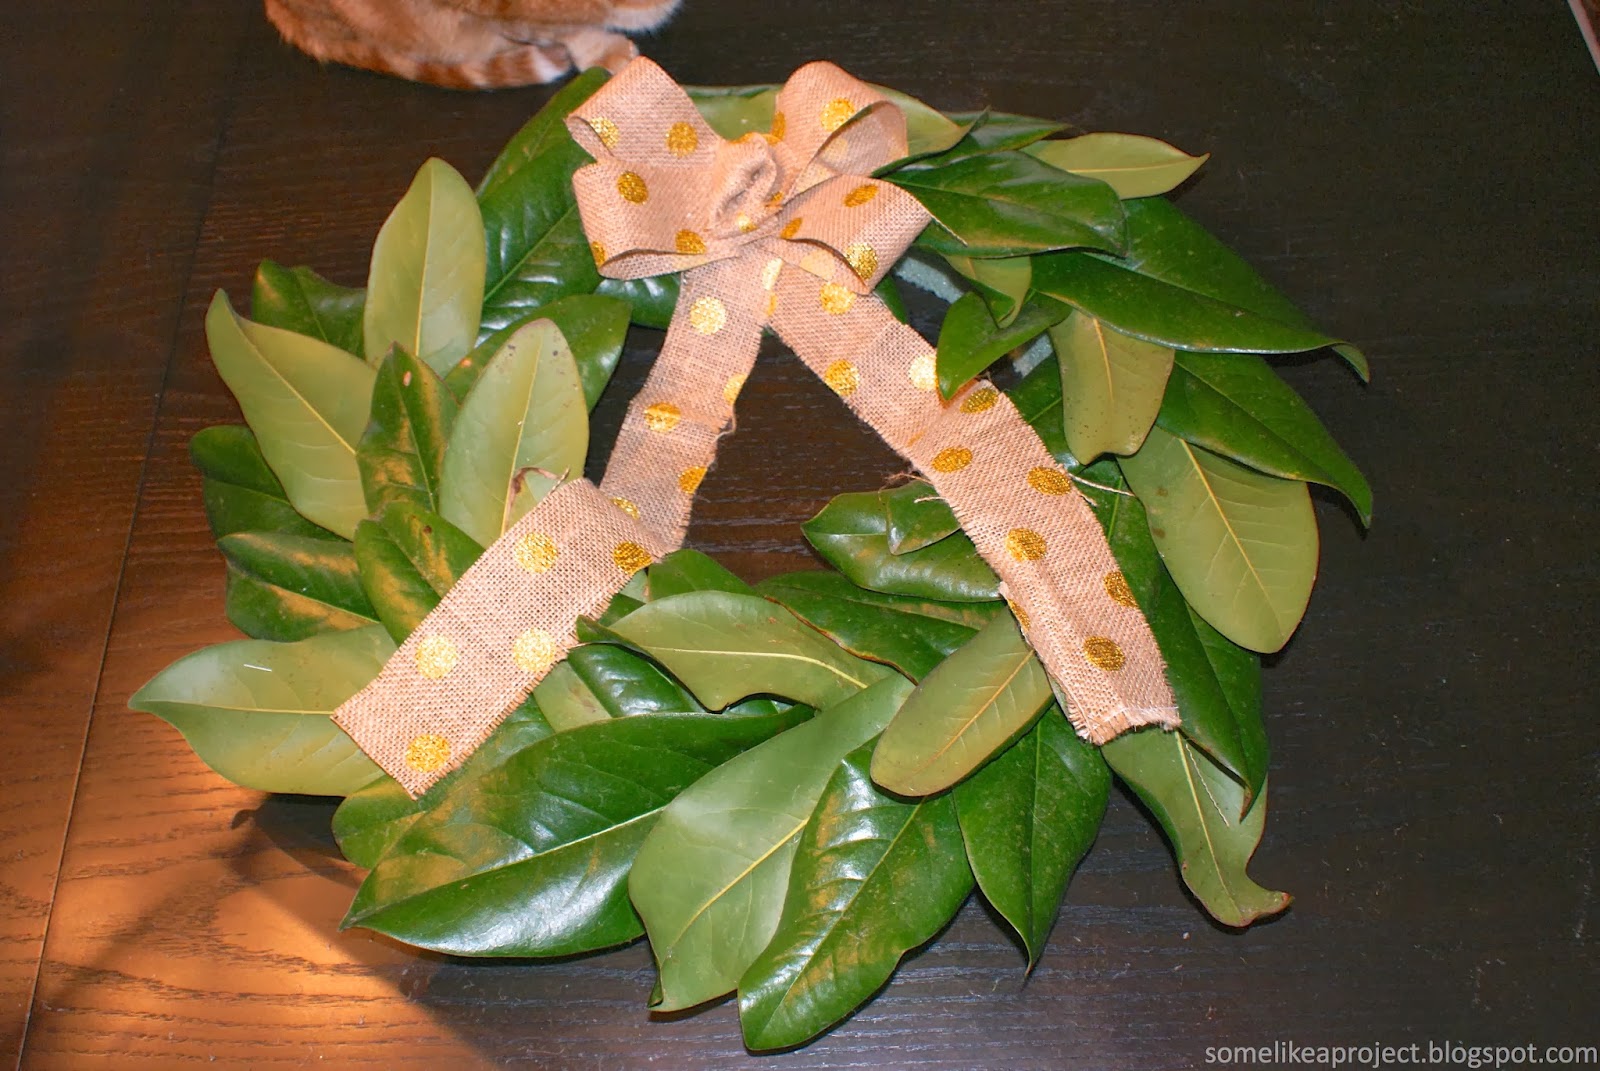
Simple Winter Magnolia Wreath

After taking down our Christmas decorations, I realized that I probably needed a new wreath to get us from post-Christmas Winter to Spring.  My ornament wreath was a little too specific to Christmas.


I didn't want to spend a lot of time or money making another wreath and so I turned to my own backyard.


According to Pinterest, a lot of people associate magnolias with Fall and even Christmas.  I notice their beauty more during this time of year - when everything else is brown and dead, the holidays are over, and the hustle and bustle has died down.  They are still green.  Still going.  Giving me hope for the coming of Spring (and after that arctic blast last week, I could use some hope for Spring).


I did have to purchase a wreath form from Hobby Lobby (but thanks to a 40% off coupon it wasn't very pricey). You will also need a lot of magnolia leaves (I think I used around 45-50), your hot glue gun, and ribbon of your choice.  


I just simply started gluing my leaves on, flipping some over so that the lighter green back was showing for a bit of variation.


I added my ribbon with more hot glue at the end and that was that.  Super quick and simple.


Things are coming along in the guest bathroom…slowly but surely.  I did have a mirror arrive yesterday with many cracks from shipping so things are not going super smoothly.  Oh, well.  We'll get there eventually.  I should have an update for you soon.  

Monday, December 9, 2013

Winter Wood Slice Wreath

As I revealed in this post, I decided to tackle a wood slice wreath for our back door this season.  After an unexpected complication, here is the final product.


I pretty much followed this tutorial.  Our local craft stores did not carry wooden wreath forms so Seth made one for me.  


And that's how you get things done without a jigsaw.  Seth also used our miter saw to slice up a log into 1/4" pieces.  

TIP:  Learn from my mistake - let your wood slices fully dry out before assembling your wreath.  (See below for the scoop on what happens if you don't.)


Since the back of the wreath was going to be visible from inside our kitchen, I decided to cover our less than perfect wreath form.  I used spray adhesive and some felt-like material that I had laying around.


I tied on a piece of white muslin so that I could loop ribbon through it for hanging the wreath later on.  This way, I can change it up in the future.


I then used my hot glue gun to attach my wood slices in two overlapping layers.  


I then used ribbon and sprigs of faux greenery for my base layer.


I added a pinecone pick, a few ornaments, and a pick with white and gold decorative balls that I found at Lowe's.


I tied on a piece of gold ribbon for hanging and voila.


And here are some detail shots for you… (notice my reflection in the ornaments?)


As for the complication…after a couple of days the wood slices began to fully dry out.  As they dried out, they started to curve and a few popped off the wreath.


I found some small pieces of wood in my craft cart to fill the gaps and was able to reattach the curved pieces.


When you look at the wreath from the front, it's not as noticeable how angled that one wood slice piece is.  

I also took a few pics of her on the front door for fun.


The wood slices are just so organic and beautiful.  I love decorating with natural (and free!) materials.  

Is anyone else getting crafty with their Christmas decor?  I've fallen a bit behind but I'm hoping to finish our tree and front porch by the end of the week.  I can't believe Christmas is only a little over 2 weeks away!