Showing posts with label dining room. Show all posts

Friday, March 20, 2015

Easy Yarn Banner Art

The wall above our "cat feeding station" has been empty since we swapped the dining room and office (then we repainted and started to decorate).  I came across a pillow with the question "Are you kitten me right meow?" on it a few weeks ago and I decided it would be the perfect phrase for this spot.

I didn't want another piece of framed art so I decided to make a banner instead.


Supplies:
  - ~ 1/2 yard of canvas
  - round dowel rod (not pictured)
  - yarn
  - fabric glue
  - string or jute (not pictured)
  - painters tape
  - stain (optional; not pictured)

First, I cut my piece of canvas to the size I wanted.  Mine ended up being 18" across by " long.  Then, I "hemmed" the side and bottom edges using fabric glue and let that sit overnight.

The next day, I measured and used my painters tape to mark off where my words would go.  I am not good at eyeballing things like this.  If you are, feel free to skip the taping.  My words would have been super crooked and uncentered without the tape as my guide.

I had originally planned to sew the words onto the canvas cloth but the canvas is so thick that the needle left a gaping hole when I poked it through.  So plan B was to use the fabric glue.

I "drew" my word with the glue and then carefully laid my yarn on top.  (Sorry for the lack of progress shots.  Bad blogger.)


After the glue dried for a few hours, I folded the top hem over my stained dowel rod and applied more glue.  The next morning, the glue at this top hem had not held.  Plan B was to use a needle and thread and sew the hem together around the dowel rod.  Turns out, hand sewing a straight line is not my forte.  Onto plan C.  Iron on hem tape.  Worked like a charm.

I tied some jute twine around the ends of the dowel rod and hung up my new banner!


I kinda wish I had left room for a question mark but I realized this after I had centered and glued down "meow".  Oh well.


I like the quirkiness it adds to the room.  It makes me smile when I read it.  Crazy cat ladies unite!

Stay tuned for some nursery updates (the accent wall is nearly complete) and a kitchen update (we bought a new vent hood and the floor tiles are going down this tomorrow!).  Have a productive weekend!

Friday, October 31, 2014

Dining Room Updates

I think I last left you here with the dining room/office switcheroo.  We finally found some time to hang a few things on the walls.

First up is this DIY mirror.

Do you recognize it?  It all started two years ago when I found the frame at a thrift store.  At first, I thought it was an actual painting.  Upon closer inspection, it was really just a print on textured paper to make it appear as if there were brush strokes.  Sneaky.  So, I didn't feel too bad about repurposing it.  After a light sanding, I sprayed the frame with multiple coats of glossy white spray paint.  


The mirror is actually our old guest bathroom mirror that I took to a local glass place and had cut down to the correct size.  It was a really thick, heavy mirror and so I decided paying $15 was worth it versus trying to cut it myself.  I used some liquid nails construction adhesive to adhere it directly to the print.  

Technically, it is a bit oversized for the buffet, but I think once I hang a couple of DIY sconces on either side of it, they will help visually incorporate the two chairs that flank the buffet and the space will appear more grounded.

We also hung some artwork on either side of the window.

Yes, I really need to get better at my photography.

The print on the left was stolen from our spring/summer mantel and is by Britt Bass.  

The art on the right is a watercolor on paper by Jessica Torrant.  


I kept it super simple on the dining room table this fall.  A couple of white pumpkins and some cotton.  That's all I felt it needed.

I love how the mirror opens up the space and bounces light around.


You can even see the painting in our foyer reflected in it.


Progress.  I'll take it.  

Saturday, August 30, 2014

New Dining Room Wall Color

I know I kept you in suspense after my last post.  I went back and forth on what color to repaint the dining room.  The sesame was just too bright and "in your face" for relaxed digestion.

It was cheery in our old office, but it was time for a change.  I considered Benjamin Moore's Woodlawn Blue (what we have in our living room), Benjamin Moore's Hale Navy on an accent wall or a half painted wall like this, or Valspar's Polar Star (what's in our entryway/hallway).

I decided to go with the Polar Star.  

(Sorry about the blown out windows.  One day I'll read this tutorial and fix those for you.)

Here is what it looks like from the new office.

I think the Polar Star was the right decision to help achieve the light and airy look that I'm going for.


So the dining room walls were coats #7 and 8 of our eight coats in eight days painting extravaganza.  

I'm going to work on an updated whole house color scheme post for you.  And I need to introduce you to our office rug and my new desk!

Have a great Labor Day holiday!

Saturday, June 8, 2013

A Styled Dining Room Buffet

After about 10 months, I have finally styled the dining room buffet.  While unpacking, our CD player ended up on top of the buffet and stayed there for months mostly due to a lack of a better place.  We knew eventually the CD player would have a spot in the living room built-ins, but it took a bit of time for us to get those built-ins sanded, primed, painted, and ready for filling.  Since those are now painted and mostly styled (post to come when they are finished), I was able to move the CD player and get started on the buffet.  Finally.


Here is what we lived with for 10 months.  Boring.  I cleared it off and used some baskets to fill the wall space above the buffet.


I picked up these baskets from Hobby Lobby a few years ago and we used them in our dining room at the old house.  


I then placed a silver tray from my good friend Anna opposite the lamp and added a couple of vases from Target and a white ceramic cow creamer on top.


I placed a new votive holder from West Elm and a sand timer from Hobby Lobby around the lamp.


And I'm calling that done for now.


Much better than an empty wall and a CD player.  I also changed the bookcase on the opposite side of the dining room...

before

after

...and the dining room hutch.

 before

after

I put our fine china on display and decluttered.  A lot.  We are having a yard sale in July and are tying to purge a lot of stuff.  I realize that now it is a bit too sparse, but I will fix that in time.  

It makes me much happier to walk into the dining room now and see these areas looking more styled and closer to complete.  


Friday, April 5, 2013

Won't the Real Slim Shady Please Stand Up?

Apparently, lampshades evoke Eminem lyrics in my head.  Anyone else?  I've been keeping an eye out for a shade for the lamp on our dining room buffet for awhile now.  There is nothing terribly wrong with the old one, except that it doesn't seem to go with the feel of the room.


It's got kind of a nubby/tweedy texture (which I feel evokes more of a shabby chic/rustic/manly feel) and is not meshing well with the modern, clean-lined buffet or the bright rug.  A few months ago, I purchased a plain white shade from Lowe's but that was wrong, too.  It didn't add any interest.  It was b-o-r-i-n-g.  I spotted this shade at Target last week and brought it home with me to try.  


I'm not normally a huge floral person, but this seemed more "fauna" to me so I was okay with it.  And, it echoes the colors in our dining room rug quite well if I do say so myself.  


I don't think Seth was too sure about it at first, but he got overruled.  It has found a home.

Friday, November 16, 2012

DIY Dining Room Art

We have a lot of wall space in this new house, which may sound like a good thing at first, but when you are trying to fill it up and make it all "homey" it can get pricey.  Trying my luck at making my own art was an easy decision.  That being said, some of us are gifted in drawing and painting and some of us are just...not.  God gave me a brain for science and not for the arts.  I've tried some abstract paintings in the past and they did not turn out well.  I may try again some day, but for now I'm sticking to typography and other "crafty" art projects.  

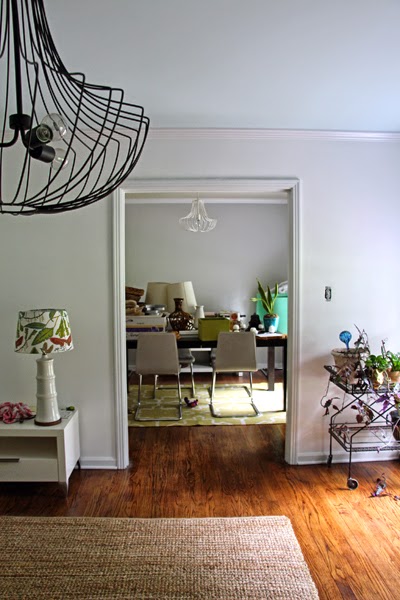
First, let me entice you with a picture of the finished art wall.


The object on the left side that got cut off is a lamp.  I wanted to give you a close look so it's other half was sacrificed for this pic.  I'll take you through the pieces one by one.

(Ahhh...there's the lamp)

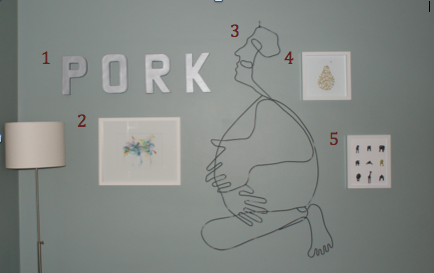
  1. These are cardboard letters from Hobby Lobby that I spray painted with metallic silver paint.  Many people have done this all in the name of trying to "steal" the look of the famous Anthropologie zinc ones.  Yes, these are roughly a foot tall and Anthro's are twice that but mine were $2.49 each (plus some spray paint) and Anthro's are $98 each.  Yeah, I'll take the small cardboard version thankyouverymuch.  I went back and forth about what to spell out...yum?  eat? drink?  dine?  So many options.  I eventually settled on pork.  For those of you that know Seth and I personally, no explanation is needed.  For those of you that stumbled across this blog and are wondering why pork, I'll just say for now that we have ties to the pork industry.  
  2. This is actually not a DIY project.  I purchased this print awhile back from 20x200.com.  Their motto is "art for everyone" with 8x10 prints starting at just $24.  I definitely recommend checking them out.
  3. Again, this is not a DIY project.  It is the "Wire Guy" from CB2.  I had been admiring him for awhile and just before we moved, he went on sale so I snatched him up.  He just looks so content with what I imagine is a belly full of delicious food.  Perfect for a dining room, right?
  4. This piece is some pear string art that I whipped up.  I was inspired by this.  I'm thinking that a letter or number (or ampersand like my inspiration) definitely has a bit more impact.  The pear kind of looks like a blob.  Oh, well.  I'm leaving it alone for now.  (Tutorial below)
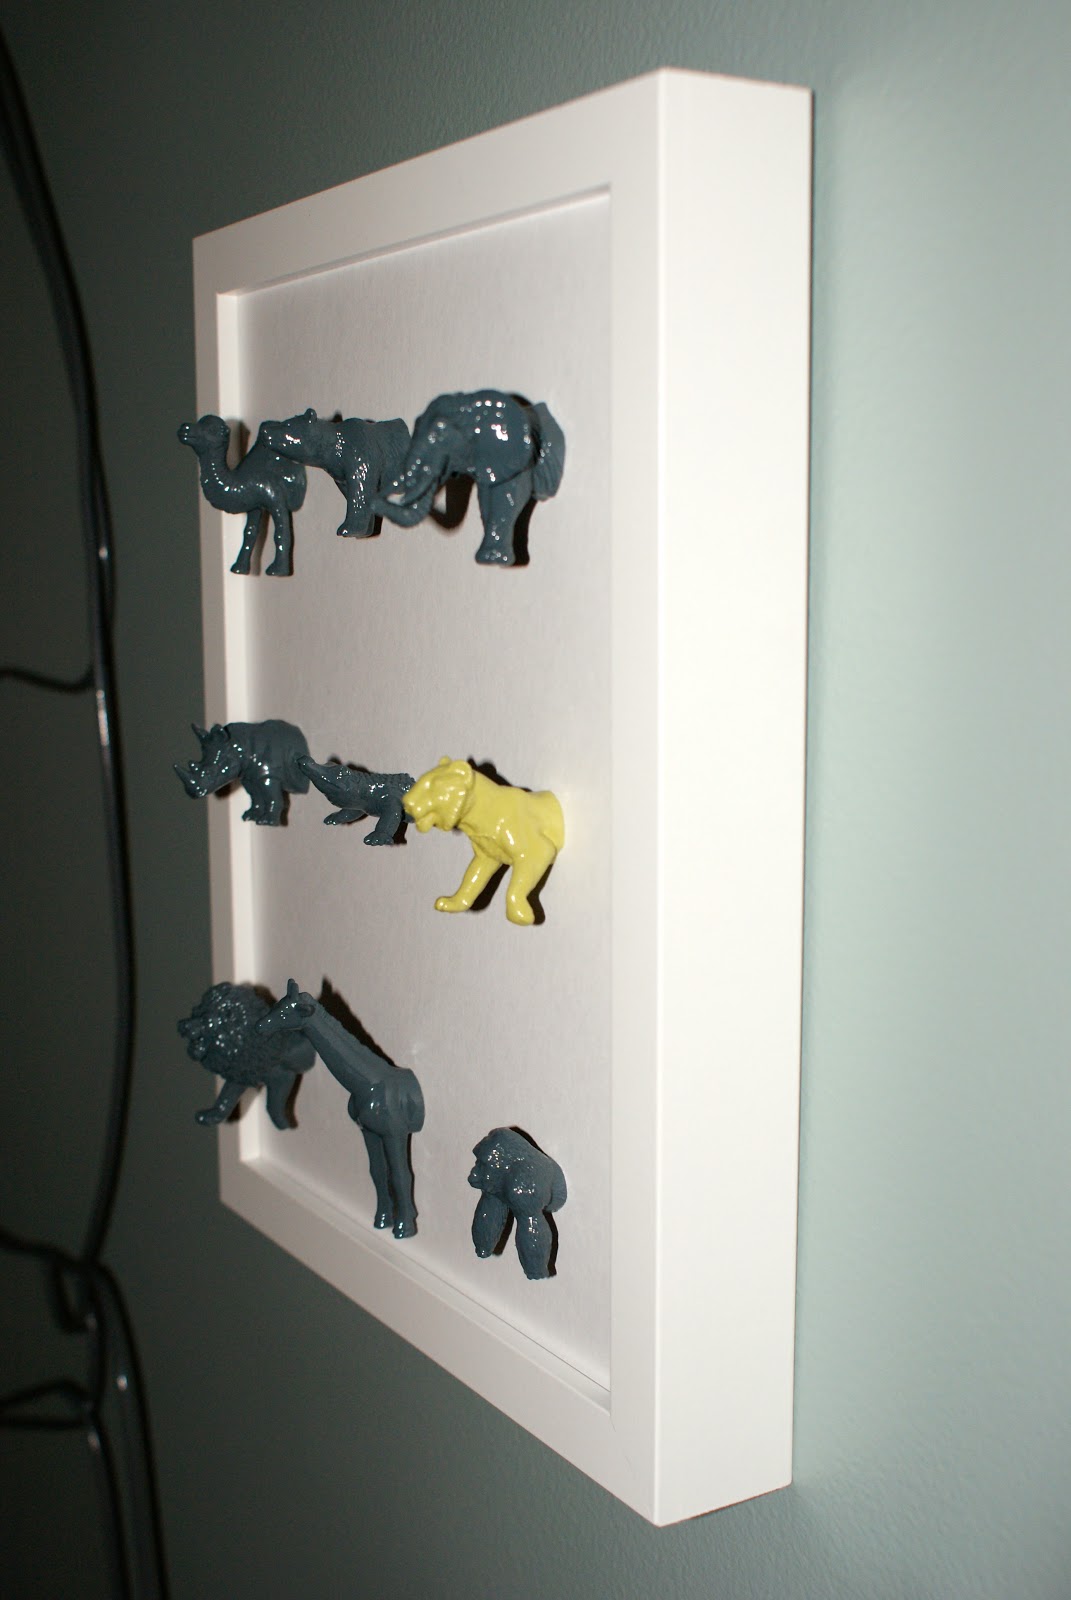
  5. I am in LOVE with this project.  Those are spray painted, mounted plastic animal heads.  Yaaaah!  I'm giddy over it.  Mandy over at The Haps is a genius.  You may think I'm weird but as you can see I'm not alone.  Jessie at Cape 27 also made one for her daughter Zoey's room and Jessie claims to love it more than Zoey.  (Tutorial and close ups below)


Now for the tutorials.  The pear string art is pretty straight forward.  You'll need:
  • a picture frame
  • a thin piece of wood cut to fit your frame
  • some embroidery floss, string, whatever you'd like
  • some small nails
  • a hammer
  • a silhouette/outline of your choice


I spray painted my piece of wood white after it was cut down to size and sanded lightly.  I googled pear silhouette and saved one that I liked.  I enlarged it in word and printed it out.  After cutting it out carefully, I used some tape to secure it to the wood trying my best to center it.  Then I started hammering in tiny nails around the silhouette.  I used quite a few nails, probably one every centimeter or so because my shape was curvy and I didn't want the curves getting "cut off" when I started stringing and becoming huge angles.  A pear is supposed to be curvy after all.


Once all of the nails were in place (I had a couple that kept wanting to pop back out), I used my string to outline the shape first.  Then I started filling in by randomly stringing across the image.  I just stopped  and knotted off the string when I decided it was done.  


I used some jute twine that I had on hand for the stem (after I untwisted and separated to get a thin strand).  And that's all there is to it.


And now for the animal heads....


For this art project you'll need:
  • a picture frame
  • cardstock
  • super glue
  • some plastic animals
  • spray paint
  • a knife
  • a cutting board
  • a pot with boiling water (optional)

After a lot of searching (Wal-Mart, Target, The Dollar Tree, Kroger, Joann's) I finally found a pack of plastic animals at Hobby Lobby.  They actually came in a fun tube that had a globe on top that you could spin around.  I am easily entertained.  And they have millions of these tubes with all sorts of different creatures inside of them.  I believe it was around $8 for the tube with the twelve jungle animals in it.  I also used my weekly 40% off coupon so it was probably just over $5 with tax.  Not too bad for a dozen safari animals.  After reading Mandy's tutorial and her comment section, I decided to try boiling the animals in water for a bit to soften them up before attempting to cut them in half.  


This worked really well.  I think I boiled them for about 5 minutes and the knife sliced through them like buttah (well, almost).


Is anyone a bit disturbed by this?  If so, I apologize.  I would never do this to a real animal. I promise.  And besides...a real jungle animal wouldn't let me close enough to try anyway. I jest.  I am not about to go roaring through the jungle wielding a large knife looking for victims.  Don't worry.


I cut nine of the twelve animals for this project and plan to save the other three for something else.  I then moved the heads outside to begin spray painting.


The lion's mane was weighing him down a bit so I used a couple of push pins to support him.  


Seth actually suggested picking out one animal to spray paint a different color and I chose the tiger.  War Eagle!  :)


I gave them multiple thin coats until they were fully colored.  I let them dry overnight and then mounted them to a piece of cardstock with super glue.  


They rested laying down flat for another 24 hours before I got the courage to put them in the frame and hang it.  I still have a fear that one of them is going to take a nose dive one day.  Super glue don't fail me now.  Seth has a fear the someone is going to brush up against them and knock one off.  I guess we'll see which (if either) happens first.  


Some of you out there might be wondering what I did with the animal butts.  I saved them, of course.  Multiple readers on Mandy's blog asked her what she was doing with hers and many even gave suggestions from making animal butt magnets to repeating the same art project with the butts and hanging it in the bathroom.  One reader even suggested including a reference to wiping.  I am not sure what I'll do yet, but I definitely laughed out loud and LOVED the cheekiness of the animal butts/don't forget to wipe your butt thing in the bathroom.  


I'm quite pleased with the way the projects turned out.  They were fairly inexpensive, they are filling up some wall space, and they are personal since I made most of them.  Check, check, and check.  Now on to filling up the walls in all the other parts of the house.

Has anyone else attempted their own art project?  How did it turn out?  Any other suggestions on what to do with the animal butts?