Showing posts with label DIY art. Show all posts

Friday, March 20, 2015

Easy Yarn Banner Art

The wall above our "cat feeding station" has been empty since we swapped the dining room and office (then we repainted and started to decorate).  I came across a pillow with the question "Are you kitten me right meow?" on it a few weeks ago and I decided it would be the perfect phrase for this spot.

I didn't want another piece of framed art so I decided to make a banner instead.


Supplies:
  - ~ 1/2 yard of canvas
  - round dowel rod (not pictured)
  - yarn
  - fabric glue
  - string or jute (not pictured)
  - painters tape
  - stain (optional; not pictured)

First, I cut my piece of canvas to the size I wanted.  Mine ended up being 18" across by " long.  Then, I "hemmed" the side and bottom edges using fabric glue and let that sit overnight.

The next day, I measured and used my painters tape to mark off where my words would go.  I am not good at eyeballing things like this.  If you are, feel free to skip the taping.  My words would have been super crooked and uncentered without the tape as my guide.

I had originally planned to sew the words onto the canvas cloth but the canvas is so thick that the needle left a gaping hole when I poked it through.  So plan B was to use the fabric glue.

I "drew" my word with the glue and then carefully laid my yarn on top.  (Sorry for the lack of progress shots.  Bad blogger.)


After the glue dried for a few hours, I folded the top hem over my stained dowel rod and applied more glue.  The next morning, the glue at this top hem had not held.  Plan B was to use a needle and thread and sew the hem together around the dowel rod.  Turns out, hand sewing a straight line is not my forte.  Onto plan C.  Iron on hem tape.  Worked like a charm.

I tied some jute twine around the ends of the dowel rod and hung up my new banner!


I kinda wish I had left room for a question mark but I realized this after I had centered and glued down "meow".  Oh well.


I like the quirkiness it adds to the room.  It makes me smile when I read it.  Crazy cat ladies unite!

Stay tuned for some nursery updates (the accent wall is nearly complete) and a kitchen update (we bought a new vent hood and the floor tiles are going down this tomorrow!).  Have a productive weekend!

Tuesday, March 4, 2014

Guest Bathroom Art Sources

As promised, I'm back with a post about the art in our guest bathroom.


It's a mix of super easy DIY art and a couple of purchased prints.


The color scheme for the whole bathroom is drawn from this gorgeous Michelle Armas print.  It perfectly pulls together the colors from the (somewhat ugly 1960s) tan tile and the teal shower curtain fabric.  


I ordered the "But the greatest of these is love" print from Jones Design Company.  The geometric heart was a quick DIY.  I just found a heart that I liked through a google search, transferred it onto some white card stock in pencil, and went over that with a copper colored sharpie.


The circular art is an elephant butt super glued onto some mint colored scrapbook paper.  I like that it's a little bit cheeky (pun intended).  The elephant butt was leftover from this project.  Inspired by this pin, Seth and I forced Amos to participate in art making.  He was not enthused.  After multiple attempts, we were able to create this paw print by dipping his paw in black acrylic paint and stamping it onto white card stock. I added his name and the date to commemorate the occasion.  Above the paw print is another simple DIY geometric piece.  I just drew some squares of different thicknesses with the copper colored sharpie.  Easy peasy.


For the art above the toilet, I used thumbtacks and a plain white canvas.  I painted the sides the same color as the vanity.


As I mentioned in the reveal post, the small gold frame contains a piece of the wallpaper that used to grace the walls in here.  Click here if you need a reminder.


The artwork above the hand towel is also a DIY piece.  I did a quick watercolor painting (drawing my palette from the room and the Michelle Armas print), cut it into 1/4" strips, and wove them together randomly.


I used a clip board with a chip clip on the side (because the clip on the clipboard wasn't long enough) to hold my pieces together.  Once you get started and have a few rows in place, everything becomes a lot more stable.


Hope this gives you some ideas for filling up your walls with inexpensive DIY art!


Saturday, September 14, 2013

Bedroom Quote Art

I've gotten sucked into the dystopian society book trend.  It started with The Hunger Games and now I am eagerly awaiting Allegiant, Veronica Roth's final book in her Divergent trilogy.  I also read Matched by Ally Condie but didn't quite get into it enough to finish out the trilogy.  Maybe someday.


After I read The Hunger Games, I couldn't stop raving about it.  I eventually convinced Seth to read it, too.  As he lay in bed at night reading, I constantly interrupted him with questions about what part he was at, how he liked the book so far, etc.  At some point, I made him start reading aloud so I could experience the book again.  We ended up reading the entire trilogy together and so the series is extra meaningful to us.

One of my favorite quotes from the trilogy is the last line from the last chapter of the final book (excluding the epilogue).  I decided it would be a good quote to use to make some inexpensive artwork for above our bed.


*** SPOILER ALERT - Do not continue reading if you're following along with the movies or still planning to read the books. ***


At the end of the book, Peeta asks Katniss, "You love me.  Real or not real?"  And Katniss tells him, "Real."  It's a touching moment.  I was always rooting for Katniss to chose "the boy with the bread".


I simply typed the quote in Word, chose a font, and had it printed at Office Max.  The frames are from Wal-Mart and were originally black.  I fixed that with some spray paint.


We also lowered the headboard a few weeks ago (we hung it a bit too high when we moved in).


It's nice to finally have some artwork above our bed.  Next up for our bedroom is some nightstand styling.

Monday, August 5, 2013

Large DIY Black & White Abstract Art

Knock-offs and variations of West Elm's abstract black and white art are popping up everywhere (like here, here, here, and here).  I'm not one to jump on every bandwagon that rolls by, but I couldn't pass this project up.  I knew it would be the perfect artwork for behind our sofa.


Instead of purchasing 30"x40" canvases (read: $$$), I decided to use some thin plywood.  I purchased a large piece and had it cut down to size in the store.  At home, I sanded the edges and attached some scrap wood so that I could later attach the frame.


I primed and painted the plywood.

Yes.  I used a wheelbarrow as my "easel".  

Then I attempted to get creative with my black paint.


I painted some pine lattice and then attached it to my scrap wood to frame out my work.


Seth used some picture wire and hung them above the sofa for me.


I love the bold statement that the new art pieces make.


After reading through the tutorial from Bliss at Home (which, sadly, I found weeks after making the art), I think I will just use a wooden frame and drop cloth from now on when I need a large canvas - how smart!  Guess that's why I'm still a baby DIYer/blogger.

Thursday, March 28, 2013

Scrabble Tile Wall Art

I guess I've been in the mood to fill up our blank walls lately, because it seems I've been blogging about DIY art A LOT.  Hopefully, you guys are enjoying these inexpensive art projects and aren't getting too bored with all the art posts.  I promise that I have other projects coming soon.  I have a couple of pieces of furniture that need some sprucing up, but the temperatures here have been too cold to motivate me to work in the carport.  I'm going to need at least 60 degrees for that.  Where is Spring???  Seth and I have also finally (I believe) nailed down the living room layout.  My mom was here for a visit and we brainstormed about all the possible options for television and furniture placement.  Now, we are working on purchasing a few new pieces and DIYing some others.  Should be some exciting stuff.  I'll share as we check things off the list.

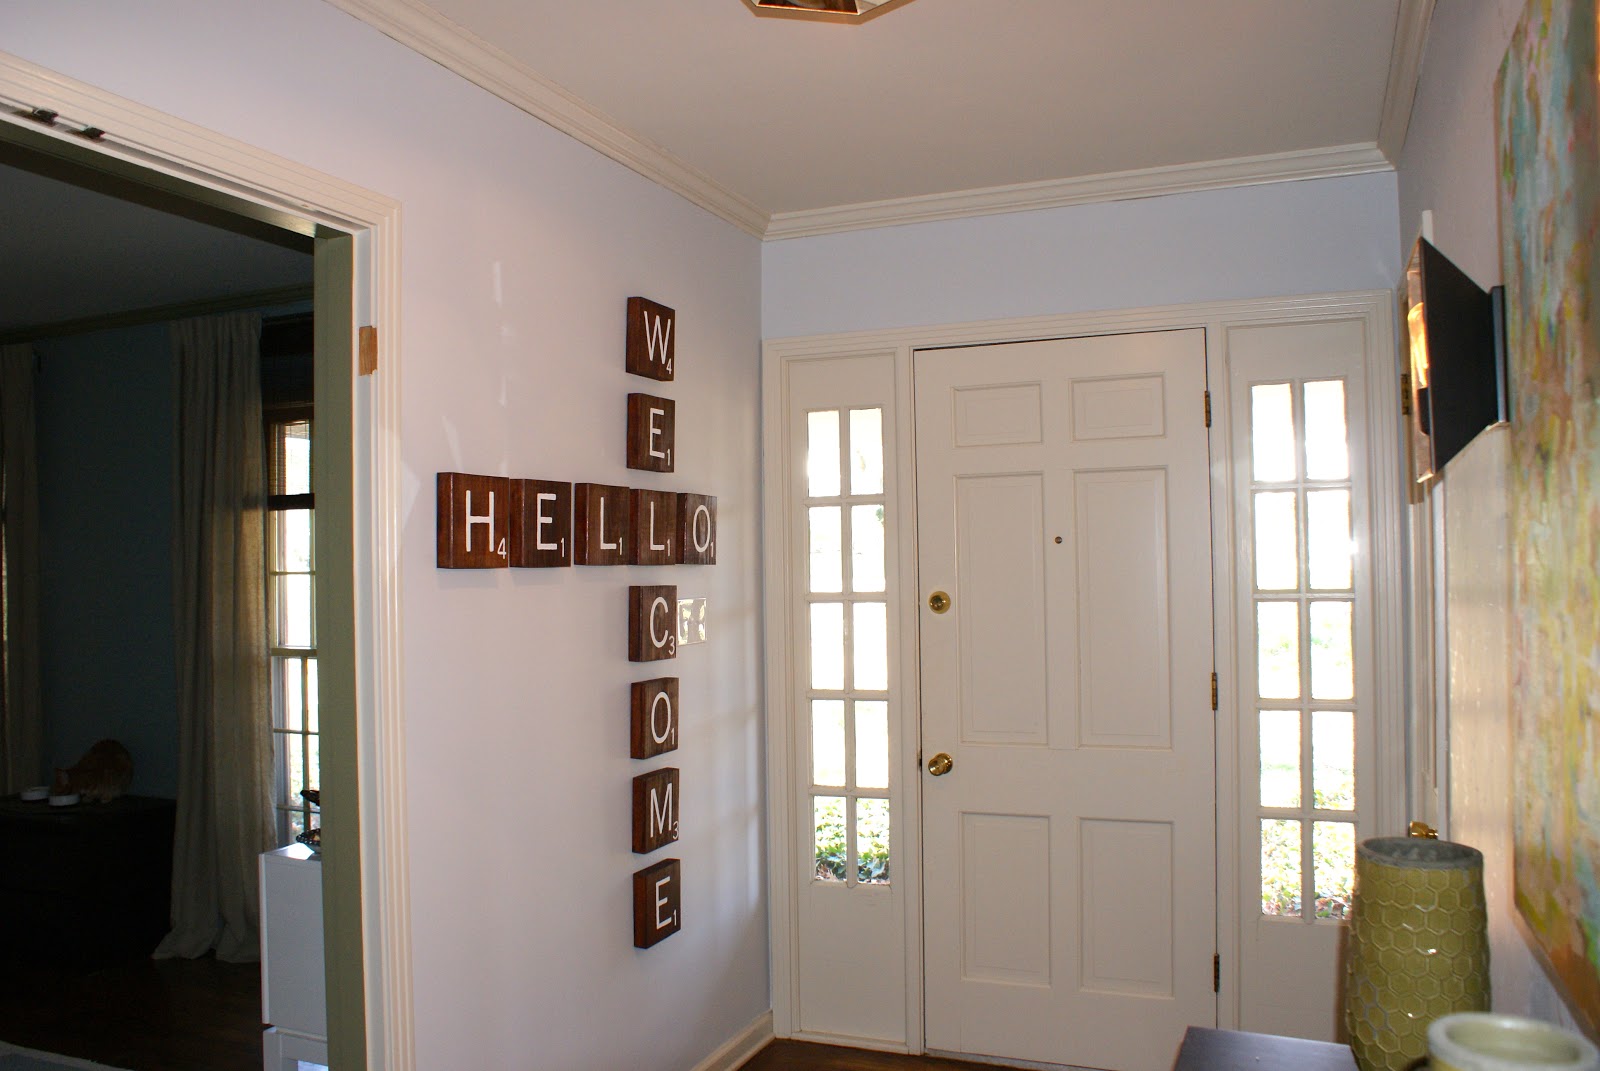
For today, I'm going to show you an art project for our entryway that I recently completed.  


I enjoy playing Scrabble and Words with Friends and I was inspired by Scrabble tile art that I've come across on Pinterest and other blogs.  Check out Jen and Tim's space (below) that was featured on Apartment Therapy.


I like it a lot but it bugs me that the letters don't spell anything.  Does that bother anyone else?  Apparently, I'm not as much of a whimsical, free-spirit when it comes to things like this.  


Here is another inspiration photo with tutorial.  I love that the wood grain is enhanced due to the way she cut her tiles.  

Supplies you'll need:
  • wood (I used two 1x8x12s)
  • a saw
  • wood stain
  • a computer with a printer or a silhouette machine (I had to do this the old fashioned way)
  • acrylic paint & small brush

Seth cut my boards into 11 tiles for me.  They are roughly 7.75" square.  Then he gave them a quick once over with the sander.  I wiped them down and then stained them with Rustoleum Paprika wood stain.  Then I decided that they were too dark and too orange.  So I contemplated my options:  1)  Sand them all down and start over, 2) Stain them darker to match our other dark wood pieces and paint the letters white instead of black (kind of the reverse or "negative" of a regular scrabble tile).  I decided to go with option 2 because it would be less work and I thought that the dark stain would create more contrast with the light gray wall.  So they aren't super traditional looking scrabble tiles, but definitely still recognizable.  And now they have a unique twist.


I knew that I wanted my scrabble art to hang just inside our front door so I decided to use the words "welcome" and "hello" for mine.  I found the closest font I could for the letters (News Gothic MT) and the closest for the numbers (Arial Narrow) and tweaked them in Word until the letter/number set looked like a scrabble tile (I had to play with how far apart they were, etc).  I printed them off and then used a simple pencil transfer method (like I did for my lobster art in the hallway) to get a faint outline on my stained tiles. I then filled in the outline with a steady hand, patience, a small brush, and white acrylic paint.


The letters aren't perfect, but I think that adds to the homemade feel of it.  We bought some sawtooth picture hangers (like this) and attached them to the back of each tile for hanging.  I love the new Command picture hanging strips, but these pieces of wood were heavy and I was too chicken to use them for this project.  


And in a few weeks, our trim should be all white!  I cannot wait.


I'm excited that another blank wall is now sporting some DIY art.  Yeah, I said sporting. Onto the next project.