
Needless to say, the seams are not completely straight or pretty. But, hey…it was my first sewing project. And it's done. And it's functional. And it's pretty unless you get really close up and inspect it. (So if you come visit us and use our guest bathroom, don't get really close up and inspect it, okay?)

I knew from the start of this bathroom refresh that I wanted an extra long shower curtain. In my opinion, they look more luxurious and make the ceiling appear taller (which is always a plus in a small space). It's not easy to find 92" long shower curtains, so I knew I might end up having to make my own. I found this fabric online and ordered a swatch. It's the perfect color, is a nice medium weight, and has a great texture. For the yardage I needed, it was a bit of a splurge, but to me, it was worth it.
When it arrived, I threw caution to the wind. Despite the fact that the care instructions on fabric.com said "dry clean only", I washed the fabric in cold water on the gentle cycle. (It's 100% cotton. What could go wrong???) I even dried it (!!!) on low heat. Yeah - I'm a daredevil. I checked on it multiple times though as my nerves got the best of me. Thankfully, everything was fine.
I smoothed it over with the iron and spread it out on the kitchen floor to cut it. To ensure I cut it to the proper length, I hung the shower curtain rod and shower curtain rings and then measured from the rings down to the floor. The finished length needed to be 92". I cut two 96" pieces (allowing for an extra 1" at the bottom and 3" at the top for hemming). Why did I need two pieces of fabric? Shower curtains need to be around 72" wide and unfortunately, you can't get fabric that wide. So, you must use two panels and either sew them together in the middle or do what I did (see below).
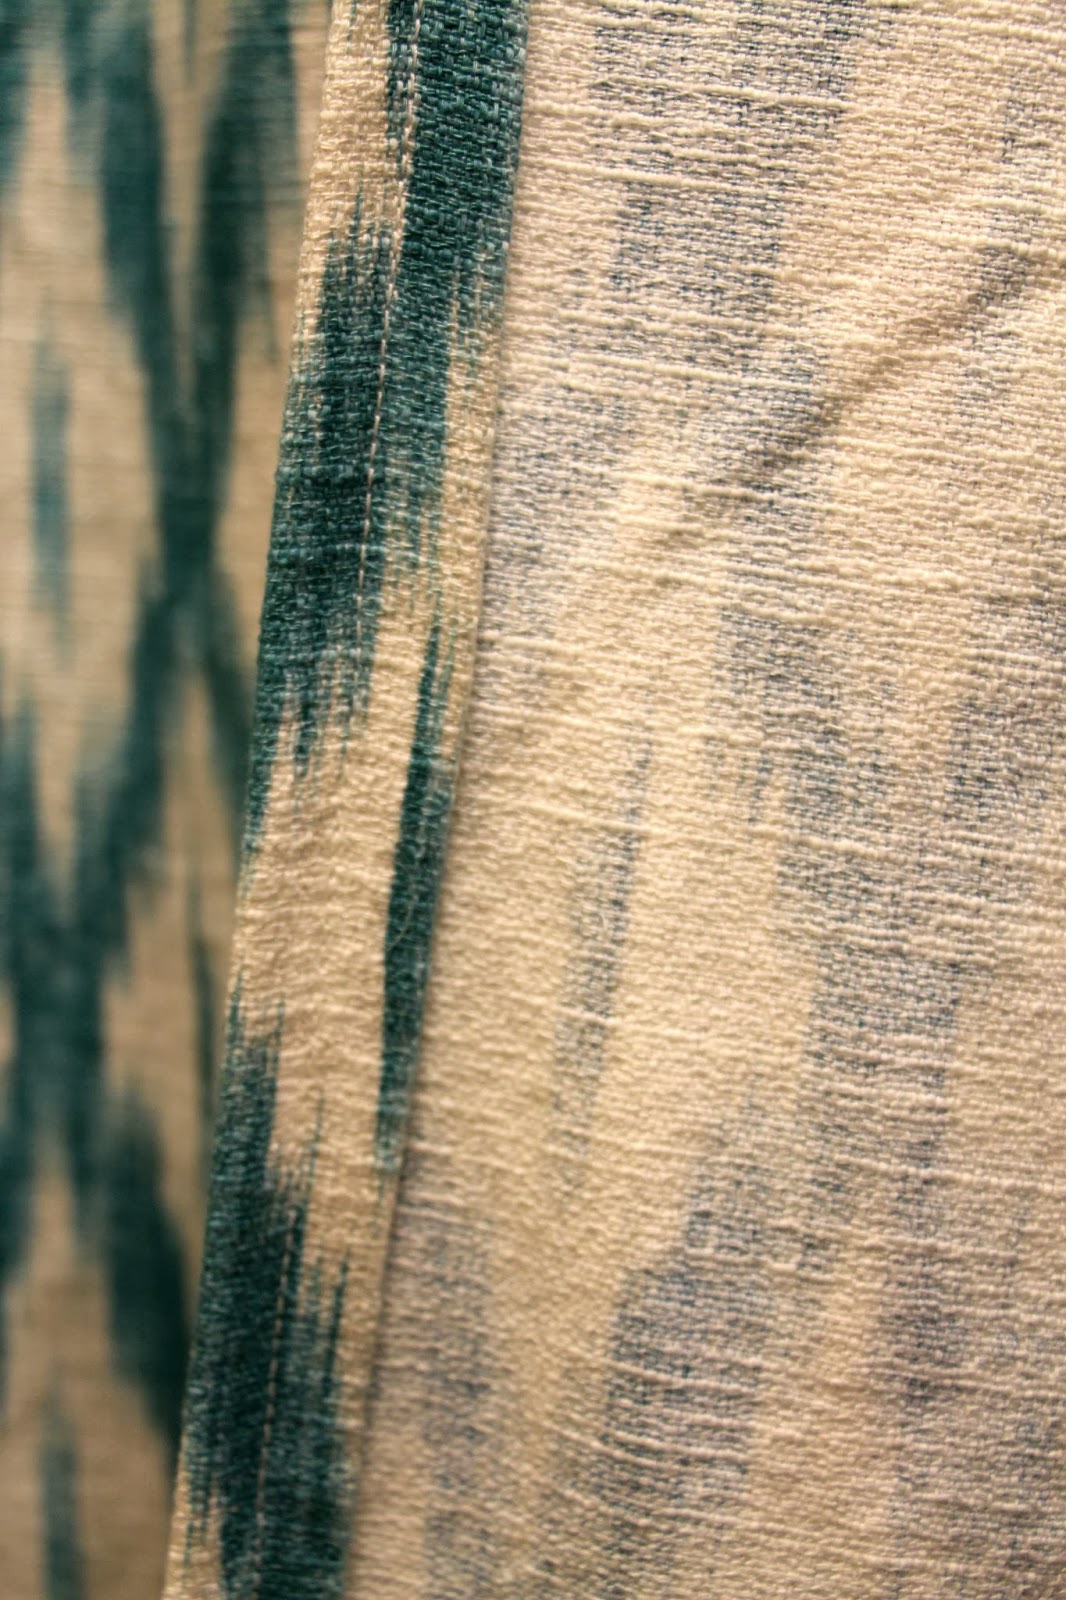
I tackled the sides first. After folding my fabric over twice to get a clean edge, I ironed it down. I used straight pins to secure it every 8-10" and then I started to conquer my fear of sewing.

I did the same thing at the top and bottom of the panels but left extra room at the top for my grommets. To keep their versatility, I chose not to sew my two panels together. I can repurpose them as curtains or keep them open for this look in the future.

So as not to push my luck with my new sewing machine, I decided to add grommets instead of attempting button holes. You can pick up a grommet kit for around $10 at your local craft store. I needed 12 grommets, so I had to buy an extra set of grommets since the kit came with only 10.

I initially planned to install six grommets on each panel, but then I decided I would overlap the panels in the center to minimize any gapping between them. So I installed six grommets on one panel and seven on the other.

My decision to add an extra grommet meant that my grommets could not be spaced the same on both panels (they're nine inches apart on one panel and seven and a half on the other), but it's not really noticeable (remember - no close up inspections allowed).

Installing grommets is pretty simple. Measure and mark where you want them. Cut out the circle of fabric. I used a combination of my X-Acto knife and my fabric scissors.

The grommet kit comes with the two tools that you need to install your grommets. Start by placing the grommet setter on a hard surface.

Then place the eyelet side of the grommet on top of the setter.

Push the center of the eyelet piece up through the hole in your fabric.

Set the washer piece of the grommet (with the prongs facing down) on top of your fabric.

Then set the anvil on top and use your hammer to secure your grommet.
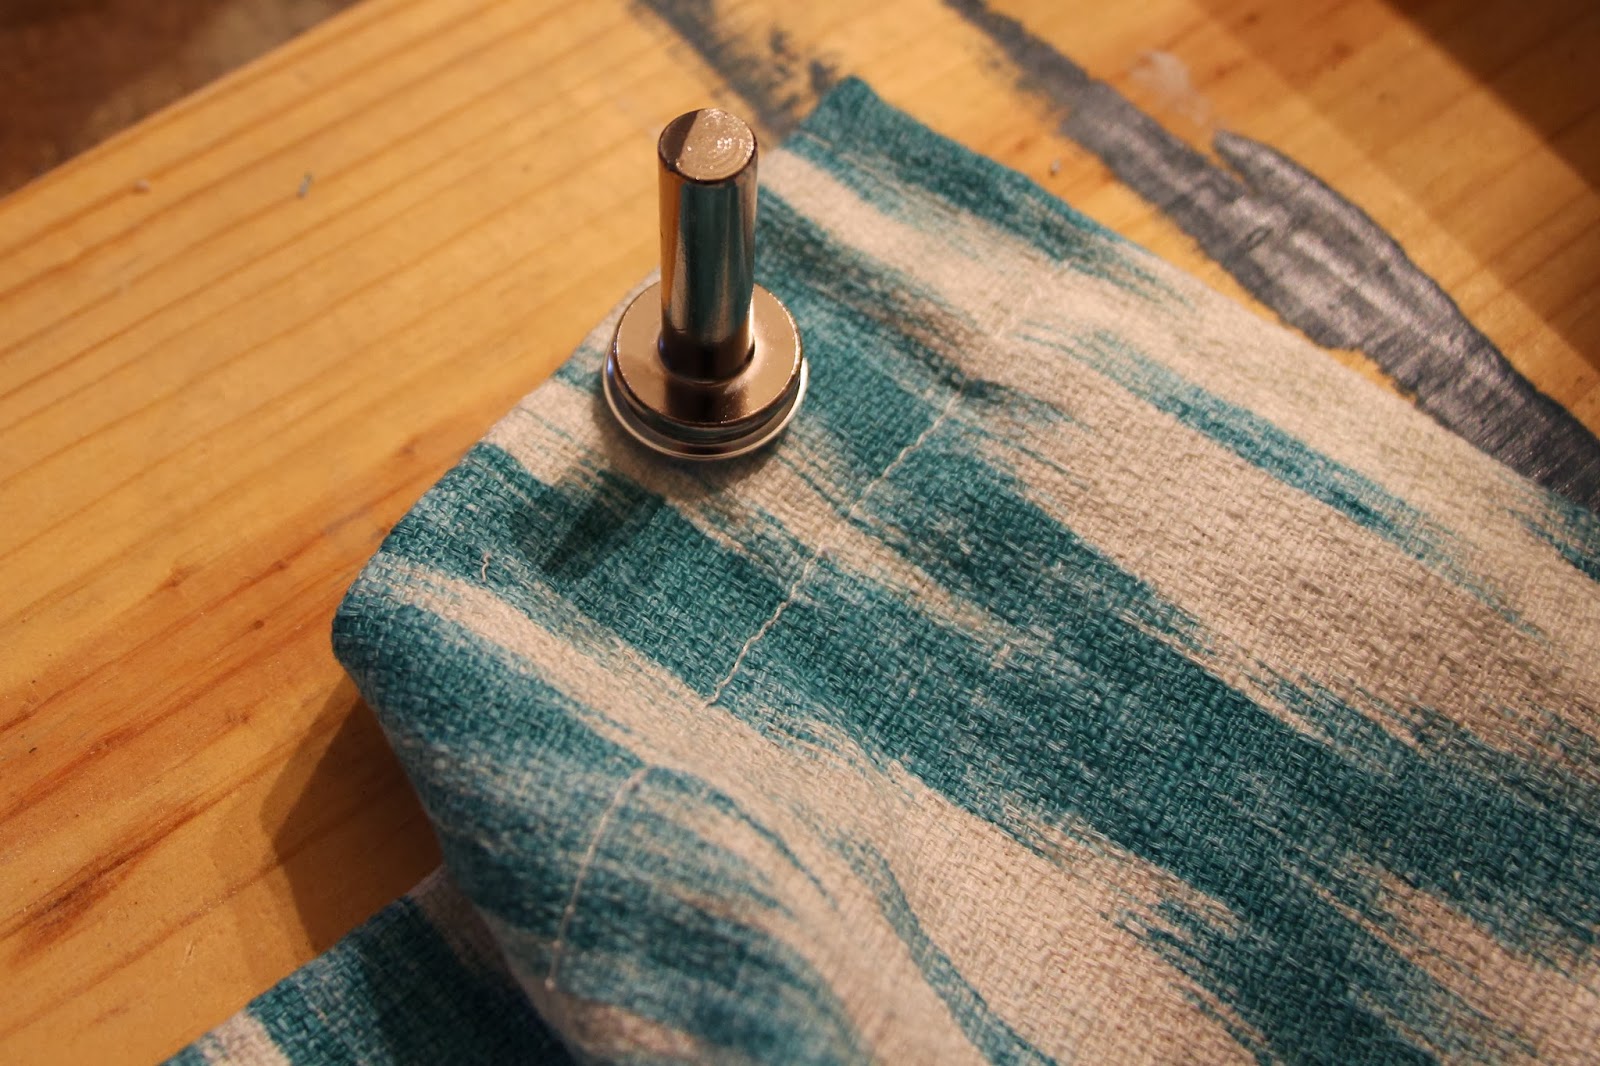
It took me about eight solid hits to get them super secure.

Aren't they beautiful? I love the touch of classiness they bring to our new shower curtain.

You'll have to excuse the wrinkles. The steam function on my iron isn't working.
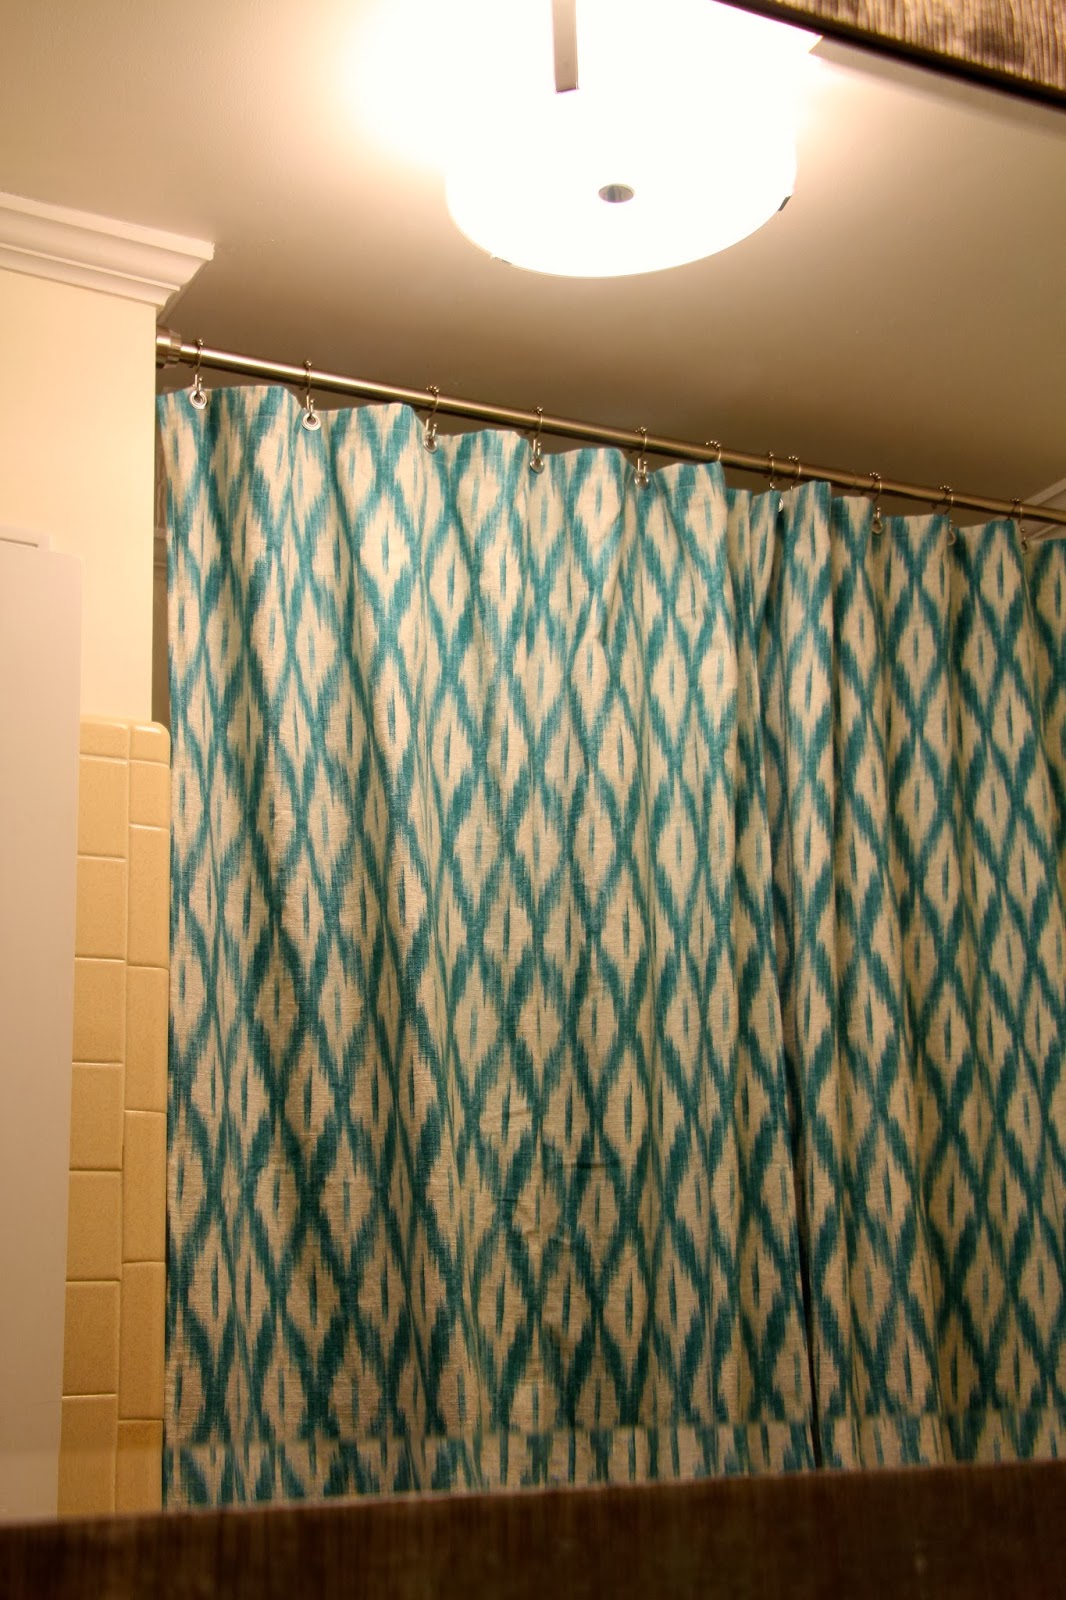
Do you like our new overhead light? I'll have a proper post for you when we get the new vanity light up. We purchased one weeks ago, but after hanging the mirror we realized that the scale was wrong. The light we chose looked teeny tiny next to our huge mirror. I ordered a larger one last week but it hasn't even shipped yet. I'm hoping it will ship this week and get here quickly. Stay tuned for a post about our vanity update.
Have a great week everyone!
very impressed with your shower curtain- I think you did a great job on your first time using your new sewing machine. I really like how you left the two curtains open, so they can be pulled back and it can be shown off in different ways. As always love seeing your updates!
ReplyDelete