Saturday, August 31, 2013

Landscaping Along the Driveway

We redid the landscaping along our driveway months ago and I've been lazy about taking pictures.  And guess what?  Now, we've lost some of our plants.  Probably only about 10% of them, but still.  Why didn't I take pictures when it was in its prime?  Lesson learned.

Someone (the builder? the original homeowner? the previous homeowner?) LOVED azaleas.  They are absolutely everywhere in our landscape.  Seth and I do not love them.  Around here they bloom for maybe 1-2 weeks at most and then go back to being ugly.  Their flowers are so delicate and they stick to everything and make a huge mess when it rains.  To all azalea lovers out there: let's just agree to disagree.  My feelings partly stem from the fact that ours haven't been taken care of properly (they are going wild in the backyard), but I still think there are prettier alternatives.  

Shortly after moving in, my dad and Seth severely trimmed back the azalea bushes along the side of the house because they were scraping the sides of our cars as we backed out of the driveway.  Months later, Seth worked up the energy to remove the stumps.


It was not an easy job.  Azaleas like to put down roots.  Everywhere.


For this bed, we decided on hydrangeas.  We found some small ones at the plant sale at our local extension center.  I highly recommend checking into plant sales in your area before shopping at nurseries or big box garden centers.  We definitely saved some moo-lah.


Please excuse the weeds in the first photo.  I'll be getting on that shortly.  It may not look like much now, but in the next few years it should be gorgeous.  One thing to note about purchasing plants from an extension sale is that they are usually cuttings or smaller plants that people propagated from their own gardens.  Therefore, the plants are still pretty immature and may not bloom for a year or so.  Since landscaping can be quite expensive, we were more than happy to save money on some of our plant purchases and use our imaginoscopes for now.  Hopefully our patience will one day be rewarded.


We purchased two oakleaf hydrangeas of the munchkin variety (pictured above), two little honey oakleaf hydrandreas (below), and two 'Lady in Red' hydrangeas (second pic below).


We also added a couple more hostas to complete the ring around our little tree (which are sadly turning brown now) and used some liriope to create a little border along the bed.

I have to say that probably my favorite thing about our new landscaping are the rocks.  Yes, the rocks.  I was the kid who went over the to neighbors pool and searched for pretty rocks among their landscaping while my brother and the other neighborhood kids practiced their cannonballs.  Yes, I'm a weirdo.  Maybe I should have been a geologist.  


The bed on the other side of the driveway runs its full length.  It was an overgrown mess of azaleas, pitiful rose stems (they couldn't even be considered bushes), lots of weeds and grass, and liriope.  Seth cleared all of this out as well so we could start with a clean slate.


Oh - except the daylilies.  They are the little spot of green at the back of the bed about halfway up the drive.

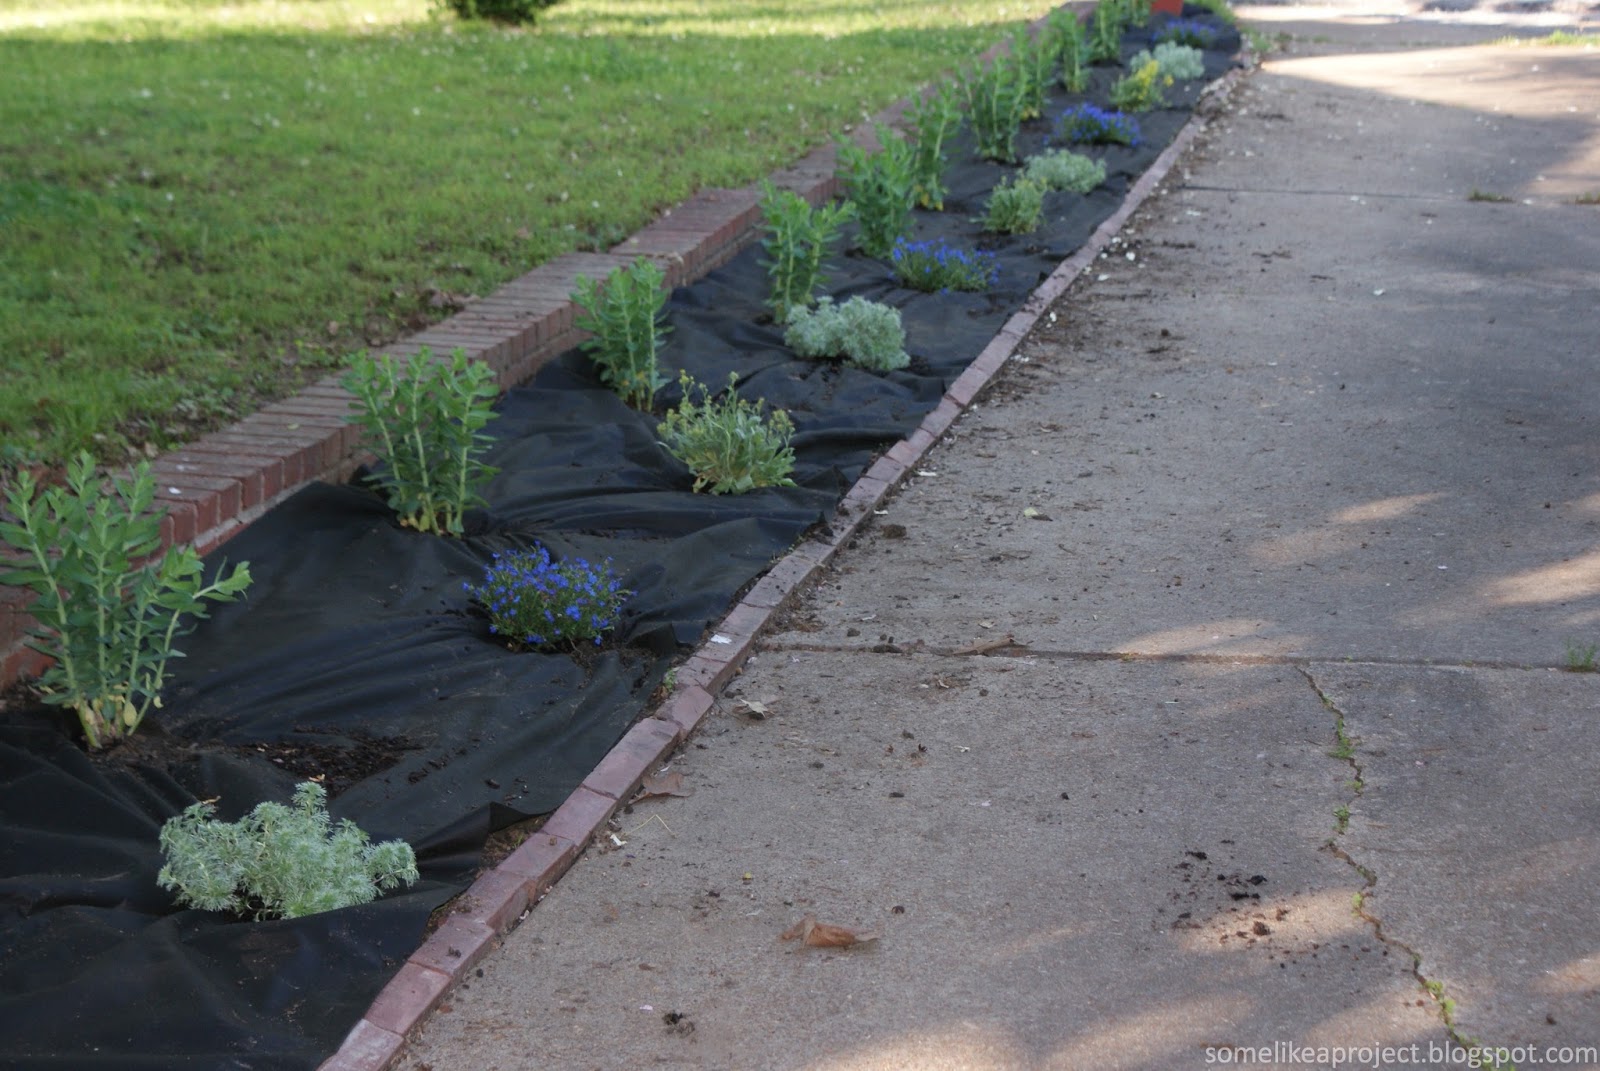
For the first part of the bed (from the top of the driveway down to the daylilies), we purchased twelve stonecrop (Hylotelephium telephium 'Herbstfreude'), four baskets-of-gold (Aurinia saxatilis), four lithodora (Lithodora diffusa), and four silvermounds (Artemesia schmidtiana).


The stonecrop were spaced evenly along the back of the bed and the other three varieties were alternated in front.


They are all perennials.  (The lithodora have since died, but hopefully the others will come back next year.)  After spacing them out, we laid down weed cloth, and started planting.


Below is after adding a gorgeous purple fountain grass at the top of the driveway and spreading the rocks.  (In the super sunny spot, you may spy an aberrant rose that is growing back from underneath the weed cloth...)


more weeds along the edges since we didn't dig up 
all of the bricks and secure the weed cloth underneath them :(

As we move down the driveway, the bed gets more and more shade.  That's one reason that we couldn't just plant the same things all the way down.  In front of the daylilies, we transplanted some hostas, which seem to have gotten sucked into the ground.  I'm not even kidding.  One day there were there, the next day only one leaf was visible, and the next day they were gone.  I'm blaming the moles.

After the daylily/hosta area, we have a couple of sedum plants with three astilbe.  (The astilbe have since either died or gone away for the season.  I'm really really hoping it was the latter.  They did bloom for us before they did that though.  Maybe the moles ate them, too?)


Next (this area is very shady) are four lenten roses that we scored for super cheap at the plant sale.  They are babies and we were told they might not bloom for two seasons.  Patience.  I hope I can keep them alive that long.  We placed some cheap annuals around them which promptly died.  (We are learning what will grow here people...another reason not to spend a lot of money on plants.)


Next comes about a four foot area of empty bed (we'll figure that out next year) before you reach the fence.  Along the fence, we planted two yellow roses alternating with three decorative grasses.


For reasons unknown to me the grass in the middle is thriving but the two on the ends are just pitiful.


Apparently, we can grow roses.  And one decorative grass.  That's something right?


We also purchased a wisteria vine and trellis for our gas lamp.  Despite the fact that it is probably not very energy efficient (because it is on 24/7), I really love our gas lamp.  I like having a part of history right in my front yard.  


That is all the landscaping that we tackled this season.  Next, we hope to focus on the grass (maybe starting this Fall) and the front of the house.  As you can see in our house tour, the front beds are filled with English Ivy.  It has to be trimmed back regularly because it grows like crazy.  I think it's getting the axe.  Literally, if necessary.  The backyard?  Yikes.  That's a whole other overgrown story.

Thursday, August 22, 2013

Styling the Living Room Built-ins

The living room built-ins are complete (at least until I tweak something) so I wanted to share some photos with you.


I am definitely not a styling expert, but I'm learning.  If you want to see some styling eye candy, look no further than Emily Henderson, Kristin Jackson, or Caitlin (whose blog I just recently discovered).  I am so in awe of their talents. The way that they layer the items in their vignettes is amazing.  But I digress...


For my built-ins, I started with my white ferris wheel (which I had to have after first laying eyes on it in this episode of Secrets from A Stylist).  The artwork to the right of the ferris wheel is something I whipped up a couple of years ago when we needed a small piece of art for the shelves in our dining room in Illinois.  It's a 'for now' piece.  The scale is a bit too small.  The vases are from West Elm.  

The art on the top shelf can be found here.  It is advertised as nursery art, but in this household adults take naps, too.  The turquoise vases on the left are from Target.  The cake stand was a TJ Maxx find years ago and the red candles are from Target.


The shelf below the ferris wheel holds a wooden tray with a cow on it from Target, a faux succulent arrangement from Marshall's, and some World Market candlesticks.  The slice of wood that the faux succulents are resting on is from a plum tree that was in our yard in Illinois.  During a storm, it split down the middle and we saved a few pieces during the clean up process.  To the right of this grouping is our stereo, which I apparently cut out of many of my pictures.


Moving downward, we have a row of books and then a woven tray with dog toys.  We use a tray because Amos is so short.  (Do you think that bed is large enough for him?)  To the right of the dog toy tray there are more books (which I turned around to decrease the amount of visible color a bit) and a bowl from Target.  The basket above contains my CD collection and was a TJ Maxx find.  (I always shop TJ Maxx or Marshall's when looking for inexpensive baskets.  Sadly, we don't have a Home Goods.)


Moving on to the strange cubbies.  


The white ceramic squirrel and fox are from Target.  The gold sphere is from either TJ Maxx or Marshall's (can't recall which store) and was originally a rusty brown color.  Some Rustoleum metallic gold spray paint changed that.  I stacked up some of my magazines (I'm sure the pile will grow) and threw a small Ikea vase on top.  The mantel clock is from West Elm.  


The Sansevieria plant (also known as a snake plant or mother-in-law tongue plant) was a gift from my mother-in-law (ironic?).  It's planted in a plastic pot but I placed it inside a wooden planter that I found at Hobby Lobby and spray painted white.  I added the gold accents last week. 


So that is how the shelves of our built-ins are looking these days.  We've come a long way.


Friday, August 9, 2013

I'm a Fickle Pickle

As you probably noticed, I changed the blog again.  This time, feel free to get attached to the new look.  I think it'll be around for awhile.  I decided to really simplify the design to let my posts and pictures stand out more.  I guess now would be a good time to work on my photography skills.  I've only pinned about 100 DSLR tips on Pinterest. Anyone else guilty of pinning away and then never actually reading the material???  Strange how that doesn't seem to happen with the dessert recipes that I pin, though.


What I have been reading about involves how to add buttons and pages and coding to the blog.  It's like a whole different world for me.  I started with a couple of baby steps.  On the bar across the top of the blog (right underneath the title), you should now see links to two additional pages.  (Until last week, I wasn't even aware that these were called pages.  I'd say I've come a long way.)  One page is simply a bit more information about me, the blog, and how it all started.  The second new page was truly a labor of love.  It's a house tour within which you will find before and after pics, links to the posts I've written about all of the projects in each space, and a bulleted list of future plans for each room.  I will be updating the house tour every so often as we continue to check projects off our list.  Future plans include creating a source list of items in our house in case you like something and want to snatch it up for yourself or a friend, and possibly adding some before and after pictures of our first house.  I hope you enjoy the new features!

Monday, August 5, 2013

Large DIY Black & White Abstract Art

Knock-offs and variations of West Elm's abstract black and white art are popping up everywhere (like here, here, here, and here).  I'm not one to jump on every bandwagon that rolls by, but I couldn't pass this project up.  I knew it would be the perfect artwork for behind our sofa.


Instead of purchasing 30"x40" canvases (read: $$$), I decided to use some thin plywood.  I purchased a large piece and had it cut down to size in the store.  At home, I sanded the edges and attached some scrap wood so that I could later attach the frame.


I primed and painted the plywood.

Yes.  I used a wheelbarrow as my "easel".  

Then I attempted to get creative with my black paint.


I painted some pine lattice and then attached it to my scrap wood to frame out my work.


Seth used some picture wire and hung them above the sofa for me.


I love the bold statement that the new art pieces make.


After reading through the tutorial from Bliss at Home (which, sadly, I found weeks after making the art), I think I will just use a wooden frame and drop cloth from now on when I need a large canvas - how smart!  Guess that's why I'm still a baby DIYer/blogger.