I guess I've been in the mood to fill up our blank walls lately, because it seems I've been blogging about DIY art A LOT. Hopefully, you guys are enjoying these inexpensive art projects and aren't getting too bored with all the art posts. I promise that I have other projects coming soon. I have a couple of pieces of furniture that need some sprucing up, but the temperatures here have been too cold to motivate me to work in the carport. I'm going to need at least 60 degrees for that. Where is Spring??? Seth and I have also finally (I believe) nailed down the living room layout. My mom was here for a visit and we brainstormed about all the possible options for television and furniture placement. Now, we are working on purchasing a few new pieces and DIYing some others. Should be some exciting stuff. I'll share as we check things off the list.
For today, I'm going to show you an art project for our entryway that I recently completed.
I enjoy playing Scrabble and Words with Friends and I was inspired by Scrabble tile art that I've come across on Pinterest and other blogs. Check out Jen and Tim's space (below) that was featured on Apartment Therapy.
I like it a lot but it bugs me that the letters don't spell anything. Does that bother anyone else? Apparently, I'm not as much of a whimsical, free-spirit when it comes to things like this.
Here is another inspiration photo with tutorial. I love that the wood grain is enhanced due to the way she cut her tiles.
Supplies you'll need:
wood (I used two 1x8x12s)
a saw
wood stain
a computer with a printer or a silhouette machine (I had to do this the old fashioned way)
acrylic paint & small brush
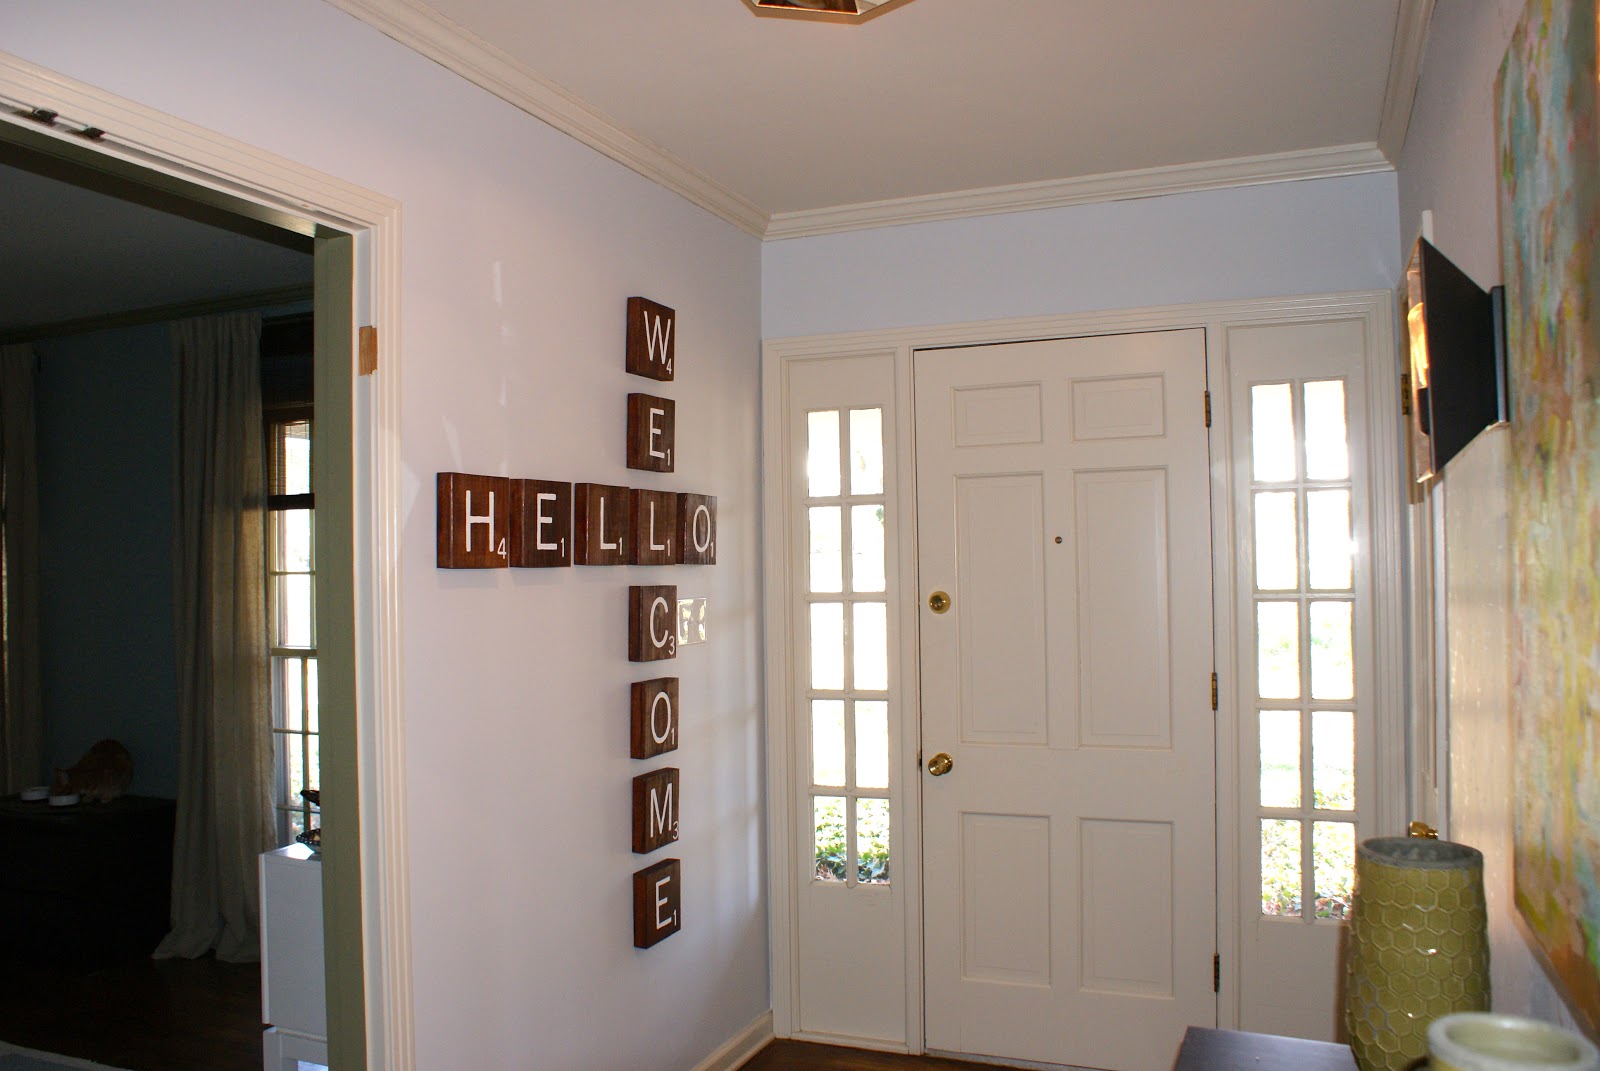
Seth cut my boards into 11 tiles for me. They are roughly 7.75" square. Then he gave them a quick once over with the sander. I wiped them down and then stained them with Rustoleum Paprika wood stain. Then I decided that they were too dark and too orange. So I contemplated my options: 1) Sand them all down and start over, 2) Stain them darker to match our other dark wood pieces and paint the letters white instead of black (kind of the reverse or "negative" of a regular scrabble tile). I decided to go with option 2 because it would be less work and I thought that the dark stain would create more contrast with the light gray wall. So they aren't super traditional looking scrabble tiles, but definitely still recognizable. And now they have a unique twist.
I knew that I wanted my scrabble art to hang just inside our front door so I decided to use the words "welcome" and "hello" for mine. I found the closest font I could for the letters (News Gothic MT) and the closest for the numbers (Arial Narrow) and tweaked them in Word until the letter/number set looked like a scrabble tile (I had to play with how far apart they were, etc). I printed them off and then used a simple pencil transfer method (like I did for my lobster art in the hallway) to get a faint outline on my stained tiles. I then filled in the outline with a steady hand, patience, a small brush, and white acrylic paint.
The letters aren't perfect, but I think that adds to the homemade feel of it. We bought some sawtooth picture hangers (like this) and attached them to the back of each tile for hanging. I love the new Command picture hanging strips, but these pieces of wood were heavy and I was too chicken to use them for this project.
And in a few weeks, our trim should be all white! I cannot wait.
I'm excited that another blank wall is now sporting some DIY art. Yeah, I said sporting. Onto the next project.
Snow Patrol anyone? I'm here to share a couple of lighting changes that have recently taken place at our house. You may remember that we found an $8 chandelier at a local antique store and hung it in the living room. That left the old living room chandelier homeless. But not for long. I knew it would look great in our guest bedroom. First, I took her outside and gave her a coat of glossy white spray paint. The matte just wasn't doing it for me. And it's amazing how much of a difference it made. Now when she is on, the light bounces off of her shiny spray painted body like a million diamonds. Ok...that's a hyperbole, but you know what I'm sayin'. A little gloss goes a long way.
Let me remind you what we were working with before.
Much better, I'd say.
We also purchased and installed some new outdoor sconces for our back entryway.
These babies are only $25 at Lowe's. Not bad. Seth is an expert at changing out lighting by now so these were up in no time.
Much better than the rusted, ornate sconces that we inherited with the house.
Do you think these would sell at a yard sale? Seth says no way. I say why not try. I'm often surprised by what people will purchase. They still work. And maybe someone wants that rustic "charm" at their own house. Guess this debate will be settled when we have our yard sale. I'm waiting for warm weather.
Ahhh...much more our style. I'm loving the industrial farmhouse look they convey. Such a simple (and inexpensive) update that makes such a big impact!
Only a few more lights left to replace around here. I'm considering this beauty for our kitchen overhead light. We currently have this light over the eat-in area and this pendant over the sink. What do you think? I hope everyone has an amazing weekend!
As promised, I will take you through our new hallway gallery wall piece by piece. Some of the art is purchased or printed and some was made by yours truly.
2. This art was a free printable from Sarah Dorsey's blog.
3. I made this by printing a silhouette of the state of Illinois, cutting it out, tracing it onto some scrapbook paper, cutting that out, and attaching it to some white card stock. The key is from our first house and I glued it to the spot on the map where Quincy (the city we lived in) is located. I painted the white mat a dark gray with some acrylic paint that I had on hand.
4. This string art was inspired by project #118 in John and Sherry's book. I first traced the Auburn logo onto some navy blue card stock. Then, I used a push pin to make holes along all four sides spaced every 1/4".
I used a ruler to visually join the corresponding holes (ie the ruler was lying diagonally across the paper connecting the 1st hole on the left side with the 1st hole on the bottom, then the 2nd hole on the left side with the 2nd hole on the bottom, etc). This allowed me to make holes in the appropriate spots surrounding the logo. Did that make any sense? I then used two colors of embroidery thread and started stringing them through the holes. I started with one color, skipped every other line and then went back with the second color.
Here is a picture of the back of it. (This was before I figured out that there was a better way to string it so as not to waste so much embroidery thread.) I numbered some of the holes so that I would know when to thread them. It was definitely a time consuming project.
5 & 6. Google helped me find the sousaphone and clarinet silhouettes, and then I just printed them onto some burlap. Seth and I were both band geeks in high school and proud of it. One of us played the clarinet and one of us played the sousaphone. I'll give you one guess as to who played which instrument. To print on burlap, I used the technique described here. There are a ton of tutorials on how to do this and most of them include ironing your piece of burlap onto freezer paper before printing. The tutorial I used did not use freezer paper. I didn't have any and I like to keep things simple around here.
That being said, you need to make quite certain that your burlap is secured all over the printer paper. If it is not, the burlap will shift during printing and the image will print crooked. I guess that is where ironing it down onto some freezer paper would come in handy.
See what I mean? Third time's the charm I guess.
7. This is a print that Seth has had for years. We just placed it in a nice crisp white frame with a mat. I love the white barn and how colorful it is.
8. I painted this quote onto a canvas using a simple transfer technique. After I printed off my words, I flipped them over and traced their outline with pencil making sure to create a heavy line.
I then flipped them back over (front side up now), placed them where I wanted them on the canvas, and traced their outline again. This left me with a very light pencil outline on the canvas that I could follow as I was painting. (You don't want me to free hand anything. Ever. I promise.)
For the lobster, I just cut out his silhouette, traced him onto the canvas, and filled him in with paint. If you don't know where the quote is from, you haven't watched enough of the greatest sitcom ever produced...Friends. The clips below explain it. Just make sure to cut it off before the horrible credit music comes on at the end (it was added by the person that put this video together).
Moving on to the other half of the wall.
9. My inspiration for the map art was this piece that I found on Etsy via Pinterest. My mom picked up a few state maps at the Tennessee welcome center one time on their way home from visiting us in Illinois. I think they were for a class project (she teaches elementary school). Serendipitously, she had one left over. For this project, I decided to use a pig silhouette versus hearts like in the inspiration piece (Seth is a swine vet for those that don't know so pigs are a major part of our lives). Again, I just used google to find a pig silhouette that I liked, printed it off, and traced it on the map around the cities that I was cutting out.
I cut out around the city where we met, the city we got married in, and the city where we currently live (Knoxville, Maryville, and Jackson respectively for those of you who are curious). Then I attached the little piggy maps to some navy blue card stock and added the words "hello.", "i do.", and "home." underneath them.
I've also seen people use the words "we met", "we married", and "we live". You could also use the cities where you and your spouse were born and then the city where you met or where you got hitched. The possibilities are endless.
10. I quickly threw this together in Word. I was going for an ombre effect and used a verse from the Bible (Psalm 46:10a) that helps me remember to slow down when I get caught up in life. It may get tweaked at some point. It's a bit difficult to see the "be" part of the phrase.
11. At the start of this gallery wall I knew that I wanted a deep canvas that I could put on hinges to cover our thermostat. This one was perfect. I painted some circles in various colors on it and called it a day. For now. I was inspired by this amazing piece by Jesse at Cape 27. Mine did not turn out as nice as hers. I think the orange is throwing mine off. It will definitely be tweaked or completely redone in the future.
I've seen some people on Pinterest commenting that a canvas covering your thermostat will affect its temperature reading. So far, we haven't noticed any problems.
12. My version of DIY paint chip art. Again, something that may get replaced in the future.
13. For those of you that don't know your Central American countries, this is Costa Rica. (I wouldn't have known either and I've been there...whoops.) The heart marks the spot where Seth and I honeymooned. It's Arenal. I highly recommend a trip there. I have been wanting to go back ever since we left.
14. This is another plate that I purchased from Anthropologie.
So there you have it. Our new hallway gallery wall. I hope it inspires you to take on an art project or two. Even if they don't turn out how you had first envisioned (like many of mine), making some of your own art will save you quite a bit of money (and you can always upgrade as your pocketbook allows). I'm still saving up for my first Michelle Armas purchase. One day, I hope. One day.
Have any of you tackled DIY art? Did it turn out exactly as you had hoped? I'd love for you to post some pictures in the comment section!
Over the past 4-6 weeks, I have been dedicating parts of my free time to working on art for a gallery wall in our hallway. All of the artwork is now completed and hung up. I am not 100% pleased with how some of my DIY pieces turned out and have plans to change some of them up in the future, but I wanted to show you what our hallway is looking like these days. I'll be back this weekend with the long tutorial post.
Around half of the artwork is sentimental - nothing like evoking fond memories as we walk down the hallway. In other news around here, we purchased a new refrigerator and she is gorgeous. I hope to have a post up about that soon also. Hope everyone is having a great week!


