Monday, January 27, 2014

Of Mice and Men

When my parents were visiting after Christmas, I put my dad (and Seth) to work sourcing and installing a new gas fireplace insert.  Our old one had a broken ignitor and the quote I received to fix it was going to equal the cost of a new low-end insert.  Considering that information, we opted to purchase a new one instead of paying to repair our current one.


After finding very few options at our big box hardware stores, the men discovered a local fireplace company with almost a dozen choices.  Seth knows better than to pick something like a fireplace insert without my input, so later that day my mom and I joined them on a return trip to the store.

It was an interesting experience to say the least.  I felt like I took a time machine back to the 1970s (or what I imagine they were like anyway).  When I stepped inside the store, I was greeted by a stale smoke smell.  There was worn wood paneling, lots of brass, and old carpet.  After getting over the initial shock of the store's appearance (and odor), I was pleasantly surprised by the variety of styles and the knowledgeable staff.

I narrowed down my options and chose a model a couple steps above the "basic" insert.  They are essentially priced by log style.  The more realistic-looking the logs, the more expensive the insert (or so it seemed to me).


The model I chose also came with a remote (see the black box on the right?).  Let me tell you - I am a wood burning fireplace kind of person, but this remote is winning me over.  (Side note: We were told that our fireplace box and chimney would need a bit of work in order to get them back to wood burning order, so we stuck with gas.  We also think gas will be better for resale one day.)  I press a button and there is fire.  It can't get much easier.  (Yes, I may be lazy.)

So where do the mice fit in???  Well, my father and Seth opened the box before we put it in the car to check the size of the fitting for the gas line.  Inside was a nest of mice.  Two of them scurried off and a third one tried to climb Seth's pant leg.  I won't go into detail, but suffice it to say that his reaction was hilarious.

When we arrived home, I asked the men to carry in the logs and parts individually and leave the box full of mouse droppings outside.  Apparently, while they were unpacking the pieces another mouse jumped out and ran into our backyard.  I am so glad he decided to stay in the box during the ride home.  If a mouse had been running around our car, I may have had difficulty staying on the road.

I don't have details on the install for you because my mother and I were baking cookies while the men handled it.  I can ask Seth if anyone is interested.  I think they just followed the provided instructions and had few (if any) difficulties.


The remote and log style were not the only things that helped me chose this model.  I was also impressed by the faux embers below the logs that glow and "burn" while the fire is on (see them in the photo above?).


We put one of our pet beds on the hearth and the animals love lounging in front of the fire.  


I love the ambiance, ease of use, and heat it provides.  It has been perfect for the chilly winter days we've been having this year.


Progress in the guest bathroom continued this weekend and I should have another update post soon.

Tuesday, January 21, 2014

Guest Bathroom Wall Color and Revised Mood Board

Seth and I are plugging away at the guest bathroom in our free time.  So far, we have removed the wallpaper, patched and painted the walls, installed a new toilet, installed a new sink, halfway installed a new faucet (Seth ran into some problems and is working on it), hung a new overhead light, and swapped out our vent cover.  I've also purchased new towels, a vanity light, some artwork, fabric to make a shower curtain, and a new extra long shower curtain liner.

Here is a peek at the wall color we chose.


It's Benjamin Moore's Mascarpone (a Candice Olsen pick - you can't go wrong, right?).  You may remember that I originally intended to go with a pale aqua.  I purchased a sample pot and painted a large square on the wall and it was awful.  It was very washed out and did not look good with the tan tile.  After agonizing and over thinking other color options, Seth and I decided a nice cream would work great.  It brightens up the space but not in a cold, sterile way.  And it pairs well with the tan tile.  I think a nice, neutral backdrop will be perfect for our patterned shower curtain and the pops of teal we'll be injecting throughout the space.  

The bathroom is actually shaping up to look more like this now:

Guest Bathroom Mood Board 2


As usual, I wish it was done yesterday.  I'm still learning patience, my friends.

Tuesday, January 14, 2014

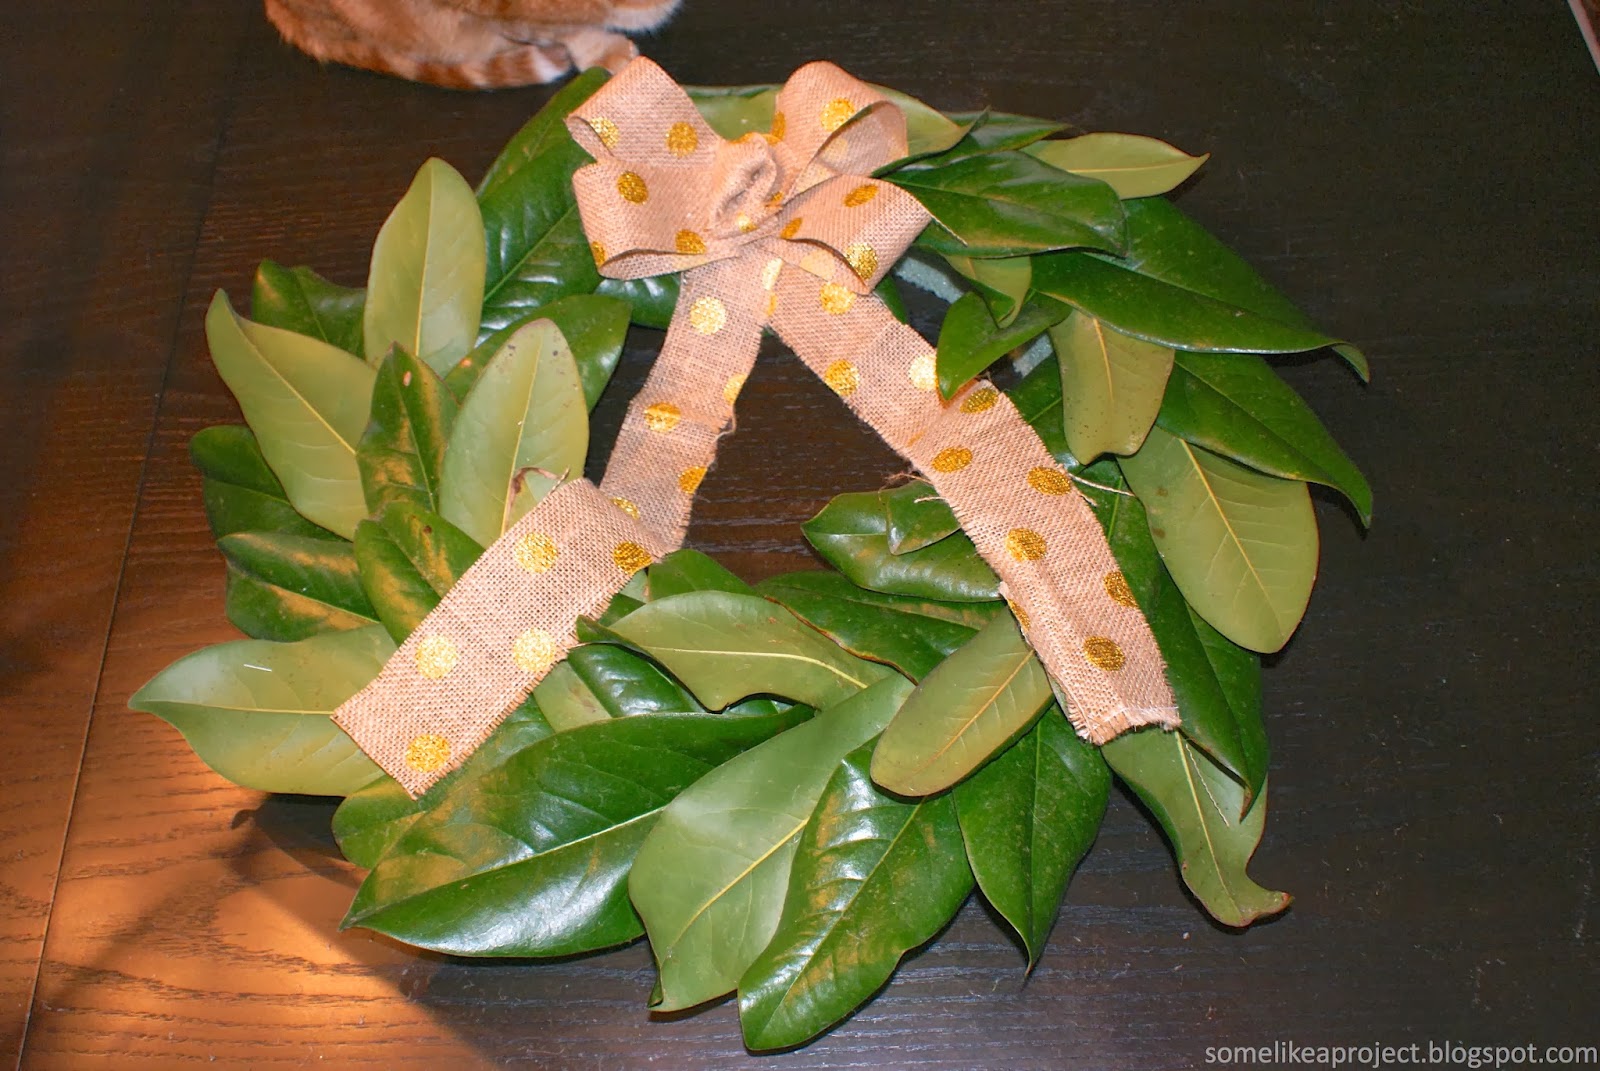
Simple Winter Magnolia Wreath

After taking down our Christmas decorations, I realized that I probably needed a new wreath to get us from post-Christmas Winter to Spring.  My ornament wreath was a little too specific to Christmas.


I didn't want to spend a lot of time or money making another wreath and so I turned to my own backyard.


According to Pinterest, a lot of people associate magnolias with Fall and even Christmas.  I notice their beauty more during this time of year - when everything else is brown and dead, the holidays are over, and the hustle and bustle has died down.  They are still green.  Still going.  Giving me hope for the coming of Spring (and after that arctic blast last week, I could use some hope for Spring).


I did have to purchase a wreath form from Hobby Lobby (but thanks to a 40% off coupon it wasn't very pricey). You will also need a lot of magnolia leaves (I think I used around 45-50), your hot glue gun, and ribbon of your choice.  


I just simply started gluing my leaves on, flipping some over so that the lighter green back was showing for a bit of variation.


I added my ribbon with more hot glue at the end and that was that.  Super quick and simple.


Things are coming along in the guest bathroom…slowly but surely.  I did have a mirror arrive yesterday with many cracks from shipping so things are not going super smoothly.  Oh, well.  We'll get there eventually.  I should have an update for you soon.  

Thursday, January 9, 2014

No More Wallpaper!

While my parents were visiting after Christmas, my mom helped me strip the wallpaper in the guest bathroom.  Remember the floral, ribbon-y, pink craziness?


It's gone.


Doesn't the bathroom look so much better already?  We got super lucky.  It was the easiest wallpaper to remove ever.  After having no such luck at wallpaper removal in her house, my mom was shocked.


It often came off the wall in really big sheets.  


Once we got down to the little pieces that we couldn't easily remove, we sprayed them down with dilute white vinegar.  After a few minutes, we could peel the stubborn pieces right off.


When all the wallpaper was gone, we faced our more difficult challenge - removing all of the wallpaper paste from the walls.  The stuff was CAKED on.  We used some rags and dilute vinegar and wiped and wiped and wiped.  I plan to go over the walls one more time (probably with just warm water) before I begin any priming or painting.  Thanks, Mom!!!


Excuse our less than photo-ready selves.  We were hard at work.

Next up, prepping the walls and choosing a paint color.  :)

Wednesday, January 1, 2014

Exterior Face Lift: Phase II

I am super pumped to let you know that our homemade shutters are complete and have been boosting our curb appeal for almost a week.


Aren't they bea-u-ti-ful?  My amazing husband spent many man hours constructing these babies and I am so grateful to him.  He pretty much took on this entire project by himself.  I also owe a big thank you to my father-in-law for supplying us with all of the lumber, to our super nice next door neighbor for loaning us his planer and table saw, and to my father for helping Seth hang them.


The lumber from my father-in-law was all rough-sawn so Seth used our neighbor's planer to smooth them down and ensure that they were all uniform thickness.  It created a mountain of saw dust.


Then he used a table saw to trim the sides of each board.


Don't let my lack of words fool you.  This was a lot of labor.  Hours and hours.  There were over 70 boards.  But at the end of it, we had some super smooth (free!) poplar.


Seth then followed this tutorial (thanks Ashley and Jamin!) to assemble the shutters.


Since we were planning to paint them, we spent some time sealing all of the cracks with paintable caulk.  I was having flashbacks to our old rotting shutters and wanted to make these as waterproof as possible.

Seth then primed and painted them.  We bought the same paint that we used for our front door (Valspar's Duramax Exterior paint in semi-gloss).  The color is Knight's Armor by Olympic.


My dad and Seth used 4" Tapcon concrete screws and our hammer drill to attach them to the house.  There are three screws holding each shutter.  Sadly, Seth could not find a countersink bit large enough to countersink the screw heads so he caulked over them (for more waterproof peace of mind) and then painted the caulk.  If you're up close you can see where the screw heads are, but it's the best we could do.


Seth is focusing in on the imperfections, but I think these shutters are such a vast improvement over what we previously had.  (Is any DIY ever absolutely perfect?)  They are so much more our style.  Just ignore the continued presence of the ugly green wrought iron columns (they are up coming down next).


A little more eye candy for you…


…and a closer peek at our front door Christmas wreath that I didn't get around to blogging about and our new shiny doorbell.


The wreath is a little asymmetrical and strange, but I love it anyway.


Happy New Year!!!