Thursday, July 24, 2014

Elevated PVC Pipe Dog Bed

If you've ever owned a chihuahua, you're probably aware that they are fairly needy.  Okay, terribly needy.  Some would blame their owners for this behavior and I will admit that until I owned one, I was definitely one of those people.  However, now that I own one, I strongly believe that in addition to their owners being a little crazy, something is ingrained in their brains that makes them so clingy.

That being said, Amos is most content when he is in our laps or in our arms.  As you can imagine, this limits productivity.  Seth and I have found that when we are out in the carport working on a project, Amos will curl up, take a nap, and leave us alone if he has a pet bed outside.  Yes, yes - he is super spoiled and doesn't like to sprawl out on the concrete like a normal dog.  I am aware of his issues.


The problem with this bed is that leaves, pieces of acorns, dead insects, really anything and everything stick to it.  Probably because it was designed for indoor use.  So I decided that we needed to build Amos an outdoor bed.

We mostly followed this video tutorial:


Since Amos weighs a mere six pounds, we scaled the bed down a bit.  We used smaller PVC pipe and our dimensions are smaller overall.  We found all of the PVC pipe supplies in the plumbing section at Lowe's, the screws in the hardware section, and the duck cloth at JoAnn's.

Our supplies:

Tools:
  • drill
  • channel lock pliers

Cost: ~$15 (the screws are the most expensive part - the smallest quantity we could find was a 100 count box)


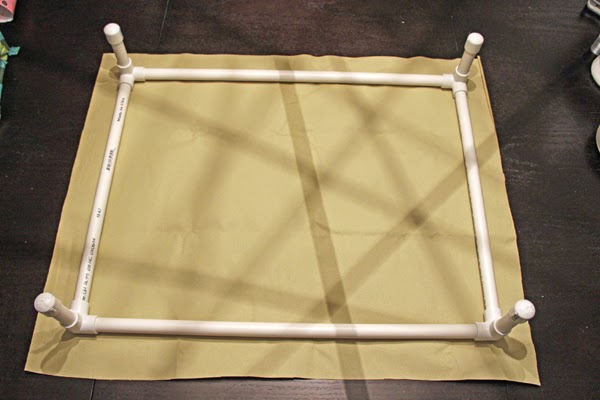
We decided to make our bed 18" x 24" with 4" legs.  Therefore, we cut our PVC pipe into two 18" pieces, two 24" pieces, and four 4" pieces.  Then we gathered our supplies and got to work. (Sorry for the crappy night time photos.  It seems to be the only time we have to get these things accomplished.)


We started by assembling the frame.

We added the legs and caps, placed our fabric underneath the frame, and cut it to size.


Then, we folded the corners in so that the edges were just inside the corners of the frame.


Next, we started with one of the 24" sides and folded the edge of the fabric under a couple of times for a finished edge before beginning to secure it to the underside of the PVC frame with the truss screws.

As the video recommends, we placed all the screws on one side and then turned the bed around to work on the opposite side.  We folded the fabric under and secured the center of the fabric with one screw.  Then, we used the channel lock pliers to twist the PVC pipe inward about 1/4 of a turn.  This helps tighten your material so that it will turn out nice and taut for your pooch.  After all, you can't have their bottom sinking to the ground.


We then continued placing screws on the second side until the fabric was secured.  Next, we repeated these steps on the shorter sides of the bed (again, securing one side fully, placing one screw in the opposite side, and then twisting the PVC pipe with the channel locks a bit before placing the rest of the screws).  


Next, flip your bed over and use a few screws to secure the corners.  The two outer screws on our corners went through the corner PVC piece and into the PVC pipe sides thereby eliminating the potential for the sides to spin.


And that's it!  If your bed will be on a slick surface, you can apply some hot glue to the bottom of your caps to create friction and help prevent the bed from sliding.  I was planning to do this, but got lazy and so far we haven't had a problem.  I may get around to it one day though.

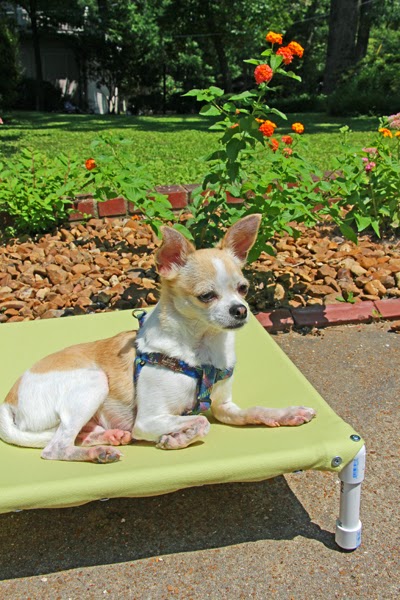
Now, bring it outside and let your pup enjoy!


There may or may not have been a landscape crew in the front yard at the house next door while I was snapping these photos.  I can only imagine what they were thinking...crazy chihuahua owner having a private photo shoot with her dog.  Oh well.  


What's important is that Amos loves his new bed!  :)

Monday, July 21, 2014

Hang Up Your Hat and Have Some Tea

I thought I would show you a few things that are currently in my antique booth awaiting their new homes.  First up is this hat rack.


The wood was in pretty good condition so besides wiping it down with some dilute white vinegar, I left it alone.  What I wasn't happy with, were the plastic hoops at the top and bottom.  They were making the entire thing look cheap.


So I removed them and replaced them with brass rings.

The plastic hoops had been held in place with screws.  Screwing through brass rings was not going to happen so we had to come up with a solution.  I can't remember whose brilliant idea it was - mine or Seth's - but we used brass wire to loop through the existing screw holes and around the ring to secure it in place.

And now, the coat rack looks like this.


Not the most dramatic change, but definitely an improvement.  Oh - did I mention that the top section spins?  That's my favorite part.

Next up, is this rusty tea cart that I found on Craigslist.  


I used a wire brush and dilute vinegar (again - yes, I try to be eco friendly and stay away from harsh chemicals as much as possible) to scrape off the rust.

I also used a razor blade to scrape off the faded key design on the glass top.  Can you make out remnants of it in the photo above?

It probably looked something like this during its prime.

The cart also needed a good wipe down.  And then it was ready for spray paint.  I decided to stick with black since the majority of it was already that color.  I focused on the top but gave the entire thing a few fresh coats after covering the glass with some cardboard.

Much better.  


I really love the scallop trim.

The last piece in this series is an amazing carved wood teapot.  It had a spring from an old pen lodged up in the spout which I was able to remove with some hemostats (I highly recommend a pair for your toolbox as mine have come in very handy during numerous projects).  I wiped it down and then I applied some danish oil to make it really shine.


I'm seriously tempted to keep this unique beauty for myself.

So do you like my finds and my tweaks to make them a bit more appealing?  I'll continue to pepper some of these posts in with my regular ones to keep you abreast of what's going on in my antique booth.  I hope you enjoy them!

Tuesday, July 15, 2014

Opening Day

Today is opening day for my booth at Carriage House Antique Market here in Jackson, TN! Seth and I have put a lot of blood, sweat, and tears into getting her ready.  Let me show you.

Here is what she looked like before:


An unpleasant green covered the walls and a very obtrusive rug hanging device was taking over the back wall.

Changing the paint color was first priority.  It took a TON of spackle to prepare the walls (and there are still multiple areas that are less than perfect).

The above pic gives you an idea of how many nail holes and defects were present on each wall. Spackling was a bit time consuming.  For our new paint color, we chose Valspar's Woodlawn Bedroom White for a nice, neutral backdrop.  (Keep reading for the reveal....)

As for the monstrosity on the back wall...the store owner removed the upper part of the rug hanging device, but did not remove the lower part as there was old shag carpet underneath that she did not want to expose.  So Seth and I came up with the idea of building a platform that we could slide over the lower part.

My apologies for the awful, grainy iPhone pic.  I didn't actually take a picture of the platform itself (in the progress of being built or otherwise) and so I had to crop it from another pic.

My first thought was to paint the platform the same color as the walls, but then it hit me that it would blend in better if it was the same color as the carpet.  With only our memories for color reference, we hit up Home Depot with the intent to purchase 1-2 sample pots or an "oops" container of paint to help conceal our platform.  Amazingly, we found a gallon of this light tan in the oops section for $9!  We grabbed it and ran.

We still weren't sure how close of a match it was going to be until we actually transported the platform over to the store and set it up.  Lo and behold, our oops gallon of paint came through for us.  (NOTE: We have quite a bit left, so if any of you are looking for the perfect dingy carpet shade let us know.  We'll hook you up.)

With the platform in place, it was time to load in our treasures.


Things went smoothly for the most part.  Until I attempted to install the shelves we custom built for the existing shelf brackets (visible on the angled walls on either side of the buffet/hutch in the photo above).  Turns out we had somehow measured wrong and our shelves were not going to work.  So...a late night trip to Lowe's for more supplies and we have started over.  I hope to have them installed and filled with artwork by Wednesday.

I'm working on some before and after posts of our "booth projects" for you, but if you're in the area, you should stop by and see the pieces for yourself!

Friday, July 11, 2014

Summer Bedding

You may remember that back in April I was chipping away at some master bedroom updates. Over the last month or so, I've made a bit more progress.  Some progress is still progress.  (That phrase is often on repeat in my head.)

One problem that I was still trying to solve is my propensity to overheat while sleeping.  My original plan was to purchase a lightweight blanket for summer and fold up our comforter/duvet and lay it at the end of the bed (for use if we Seth gets chilled during the night).  But while browsing TJMaxx one day, I came across an amazing lightweight quilt.  

I love the chevron stitching.  It's subtle, but it gives the quilt a great texture.

Most importantly, it's very lightweight.  I have been sleeping at a comfortable temperature. Yay!

The other change that you may have noticed are the sheets.  Previously, I had a plain white sheet set on our bed, but then I realized that these light blue sheets from Target would add a bit more interest.  So I stole them from our guest bedroom.

I think I am finally done tweaking the bedding for awhile.  Until it starts to get cold again anyway.


And yes, I still have artwork framed and ready to hang above our nightstands.  I've had time to hang the new pieces, but I have been waiting until I have our nightstands organized and ready to ensure that I hang them in the exact right spots.  :)

I forced Seth to start using a new, more modern alarm clock and I made him a wooden vertical filing thing (what should I call it???) to hold his books, kindle, iPad, etc.  It's difficult to incorporate organization into that boy's life.  It is a daily struggle.  I'm sure you have no idea what I'm talking about, right?

I hope to reveal some transformations that I've completed for the antique booth soon.  Have a great weekend!

Wednesday, July 2, 2014

The Evolution of Our Living Room

Ever since I added the new woven bench and pet silhouette art to the living room, it has felt almost complete.  Of course there are a few small project ideas still tumbling around in my head that may get tackled one day, but I would estimate that the room is 90% done.  In honor of its near-completeness I decided to take you on a journey through its evolution (and remind myself of how far it's come).

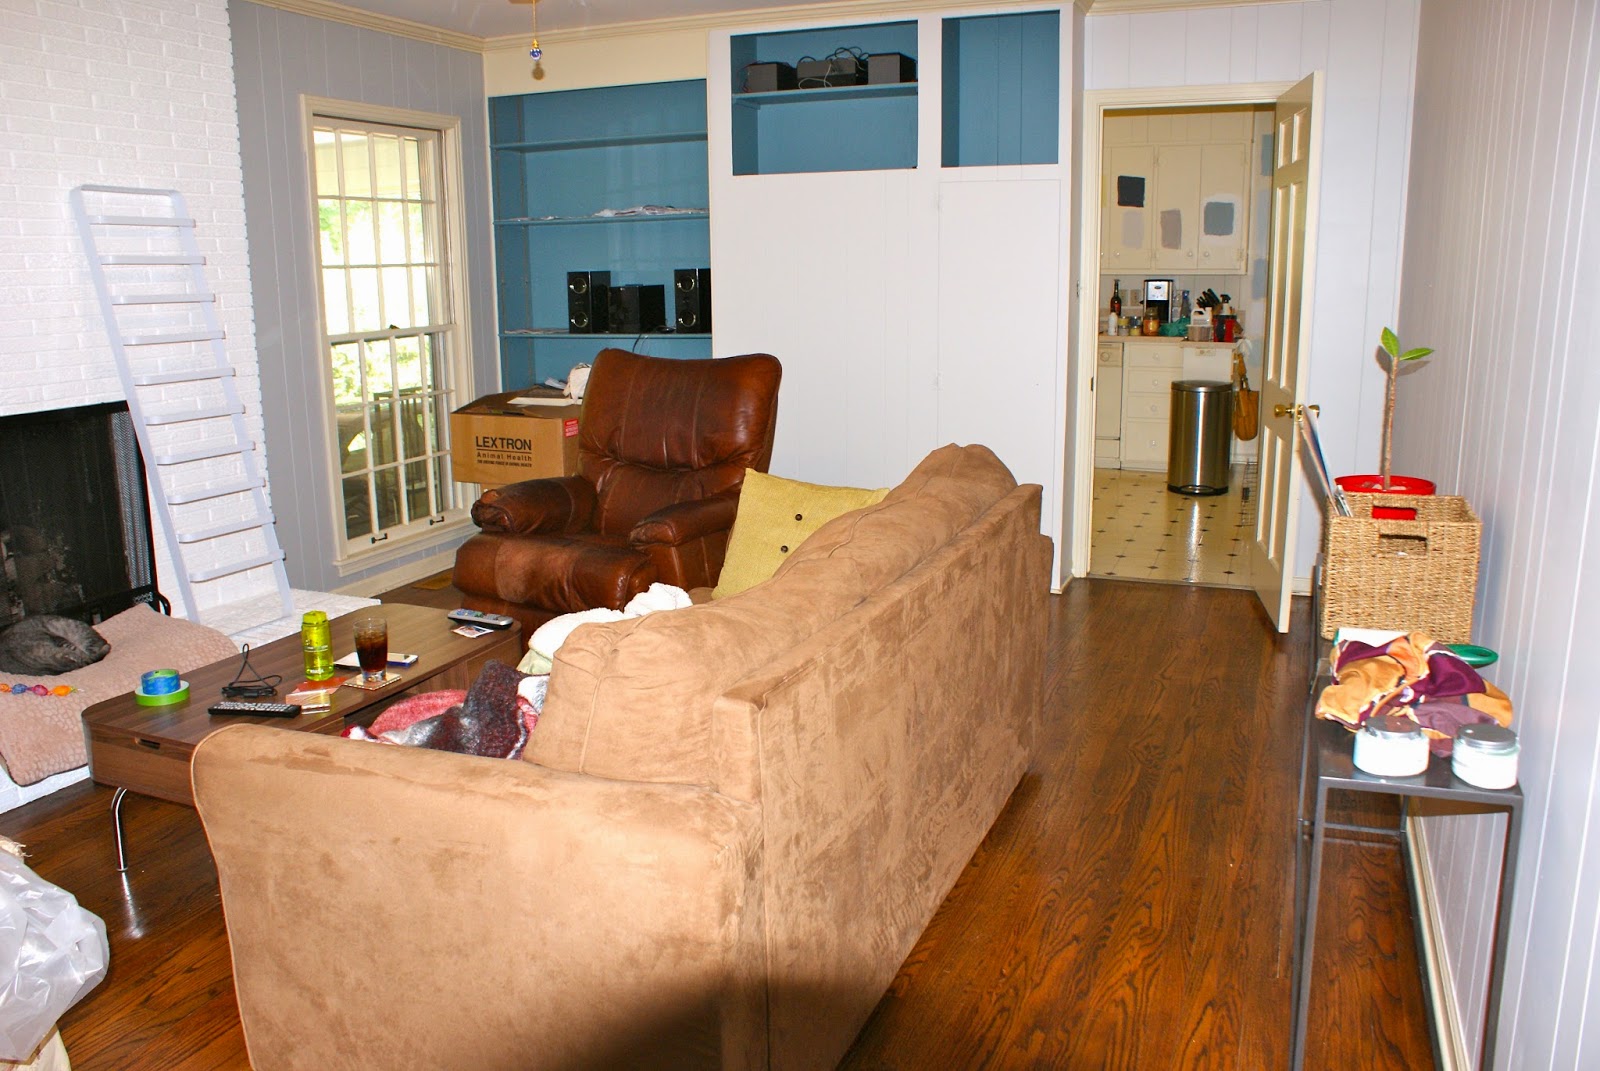
We'll start at the very beginning.  Here is how she looked on move-in day:


Ahhh...a hideous ceiling fan and TONS of cream.  Our first project was painting the cream colored brick fireplace.  We chose a bright white.  We also painted the walls (for the first time) - light gray with a darker gray accent wall (ignore the light blue rectangles in the photos below - I had already nixed the gray).  


I wasn't loving the gray so we repainted the walls a nice classic light blue (Benjamin Moore's Woodlawn Blue).


We sold our brown microfiber sofa on Craigslist and purchased our first grown up one.

We then moved the television and installed a gallery wall around it.  (This is also one of the last pics of our garage sale floral chair that served us well for over three years.  See it there on the right?  I know you're jealous.)

We switched out the ugly brown ceiling fan (see the third pic in this post) for the chandelier that we had removed from the dining room and spray painted white.  


But then we found this larger chandelier at a local antique store for $8.  I can't say I've ever seen another one like it.


We then tackled the built-ins and my wonderful parents hired painters to paint all of our crown molding, baseboards, window molding, and interior doors bright white.  (SOOOOO grateful and glad that Seth and I didn't have to do this.)  The bright white trim completely elevated the look and feel of the entire house!  The cream colored doors and trim looked so dingy.


We purchased a couple new chairs, two dark orange poufs, and a new fireplace screen.  We also nailed down the best layout for the room and moved the TV back to its original location (it was causing too much neck strain).


We built a floating fireplace mantel just in time for the holidays.


Next, we made a wooden "topper" to extend the length of our console table, made some art to hang behind the sofa, and purchased some new pillow covers.

I made over an Ikea Vittsjo coffee table with gold spray paint and a piece of corrugated tin (still one of my favorite projects to date).

I also took some time to "neutralize" the built-ins by turning almost all of the books around and removing some of the more colorful accessories so they wouldn't compete with the mantel decor.


I found a new television stand at TJ Maxx that worked better in the space (note the mess of cords underneath it).


And hung another gallery wall around the television.

But it was too busy and detracted from the fireplace and mantel decor (I was trying very hard to keep the fireplace/mantel the main focal point of the room) so it had to go.  In its place, I hung Fred the cardboard moose and added our West Elm floor lamp to the corner.  Much better.


Recently, I cleaned up our mess of TV cables and cords using a cord cover (later painted to match the wall), zip ties, and industrial strength velcro.


We also flip flopped the living room and master bedroom rugs which helped break up the sea of blue and gray.


Lastly (as I mentioned at the beginning of this mile long post), I figured out a solution for the remaining blank wall.


Projects that I'd still love to tackle include artwork for the blank space on the built-in wall,

and a DIY wooden kennel for Amos.

Now for a few before and afters...


Thanks for sticking with me through this lengthy post.  I'm so happy with how far this room has come!