


this is supposedly from better homes and gardens but i can't find it on their website
I really liked the third picture and how she used antique-looking knobs to hang her necklaces and bracelets on. However, I didn't want to copy her earring display since I needed A LOT more earring display space. I liked the photos with the mesh screen used for earring display. Off I went to Hobby Lobby and Lowe's for supplies. (I think Lowe's is going to put a cot out in one of their aisles for me soon.)
I came home with the following supplies:
- assorted plain and printed scrapbook paper (from Hobby Lobby at 40% off)
- 4 frames (from from Hobby Lobby at 50% off)
- assorted decorative knobs (from Hobby Lobby at 50% off)
- aluminum mesh screen (from Lowe's at 5% off with my trusty, worn-out Lowe's card)
- bolt cutters (also 5% off since I paid with my Lowe's card)
I started by laying out the frames I had purchased (along with one I already had) so I could figure out where I wanted earrings (mesh screen) and where I wanted necklaces and bracelets (cardboard and scrapbook paper). Then I measured and cut the screen for the earring frames.


I thought I was going to be able to use my staple gun to secure the screen, but the staples were too long and would have come through the other side (the larger earring frame had only 1/8" depth to work with). Then I thought about regular staples, but my stapler has a curved "nose" and I couldn't get it into position. I debated another trip out of the house to search for some sort of tack that I could hammer in to secure it, but then I decided to try the hot glue gun. It is holding so far, but I am a bit concerned about long-term strength. I may still search for some tacks and really secure the mesh at a later date.
While I had the frames laid out, I also took the time to plan which pieces of scrapbook paper would go in which frames and which knobs I would use.


I then cut cardboard (we still have quite a few boxes) and the paper to fit. I used spray adhesive to attach the decorative paper to the cardboard. I then used a hammer and nail to create holes through the paper and cardboard where I wanted the knobs to go. The holes were slightly smaller than the knob shanks (I think that's the proper term) because I wanted to make sure they would be secure. I used the bolt cutters to cut off the excess shank. On a couple of the thicker ones I had to break out the hack saw and partially saw through it before I could use the bolt cutters to finish it off. Then I screwed the knobs into place.

The cut ends on the back of the knobs were quite sharp and I definitely didn't want them scratching the wall so I used some small felt pads to cover them.

I considered using paper to lay out my frames, trace their outlines, then tape the paper on the wall and hammer away like this, but I decided that was too much work for five frames. I would definitely recommend it for a larger group though.
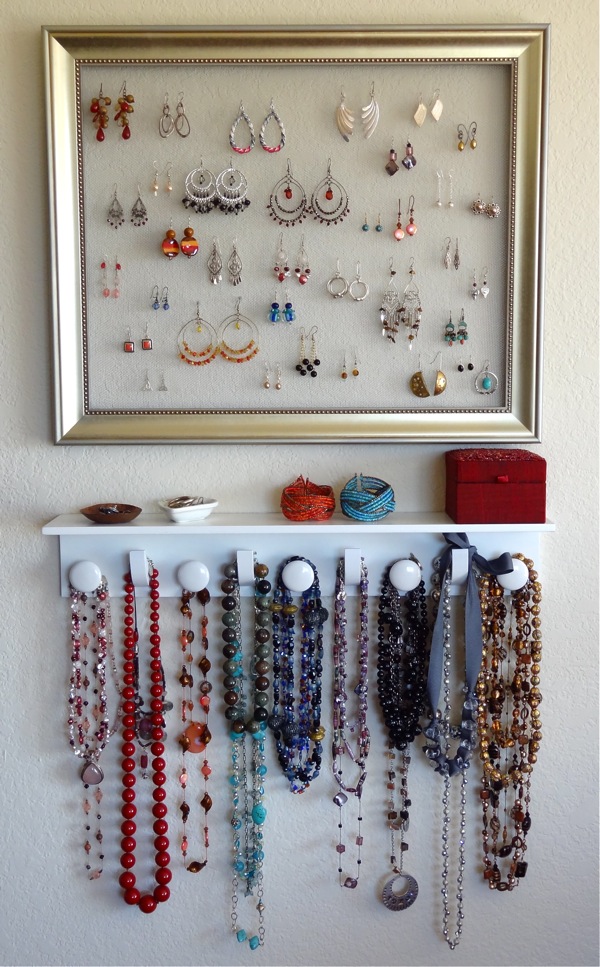
So, I just used a measuring tape and winged it. Here she is ready and waiting for some bling. (I'll show you more complete shots when I post the master bedroom reveal.)

And all decked out...


In hindsight, I probably should have taken the time to measure my necklaces and designed a more custom display. In my defense, however, I had planned to hang the largest frame (in the center) vertically for long necklaces, but somehow when I was piecing together the scrapbook paper for that frame I completely forgot that plan. It took four pieces of scrapbook paper to fill the frame and getting the design lined up properly was a bit of a pain. So, when I realized that I had oriented the design on the scrapbook paper in a way that would kinda force me to hang it horizontally, I was super disappointed, but also unwilling to make a trip to Hobby Lobby for more paper and unwilling to start all over again. Oh, well. It's rare that any project I complete actually turns out how I had first imagined. That said, I am quite pleased with the results. Our master bedroom is really starting to come together!
No comments:
Post a Comment
Thoughts, ideas, suggestions...