Exterior (front)


So far, we have:
- purchased a new outdoor rug
- purchased a large doormat (the normal 2' x 3' size looked dinky)
- set up our outdoor furniture
Still to do:
- replace or at least repaint our shutters (I'm thinking something like this except painted and something other than the current dark green color)
- paint the front door a fun color
- change out front door hardware including the house numbers (anyone notice how off center they are?!? please don't bring it up in front of Seth)
- replace or somehow frame out the wrought iron columns (we like more of a boxy craftsman look)
- consider a new mailbox
- figure out a landscaping plan (I'm thinking we need hydrangeas somewhere)
Before we go inside, let me remind you of our floor plan (with our paint colors thrown in for good measure).

Entryway


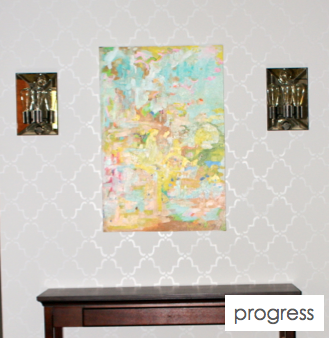


We have:
- painted the walls (Valspar's Polar Star)
- replaced the overhead light fixture
- replaced the sconces
- replaced the plugs, switches, and their covers (they were all cream and Seth is working on replacing them throughout the entire house - he is awesome!)
- stenciled a feature wall
- hung some art
- added an area rug (we chose Flor tiles in order to make sure our "rug" was the exact size we wanted)
- hung some white cubbies
Still on the list:
- paint the console table (I bought the paint over a month ago, I just haven't tackled the project yet)
- style the console table
- style the white cubbies
- paint the trim and closet door white
- paint the inside of the front door (white?)
- purchase a small doormat for just inside the front door
- DIY some art for the spot across from the coat closet (I have some ideas)
Dining Room
(previously the formal living room)


The dining room has turned into a dumping ground of sorts for our boxes of wall decor. Yikes! After painting and repainting this room, I am without a doubt absolutely in love with the Wedgewood Gray (Benjamin Moore). I estimate that we are 50% done in here.
We have:
- painted the walls (too many times)
- purchased a large (9' x 12') area rug
- added an overhead light fixture (We hired an electrician to come out since this room previously had no overhead fixture. Seth is super comfortable changing out lights where there are already wires but neither of us has experience running wires down from the attic and cutting holes in ceilings.)
- replaced all of the plugs, switches, and their covers
- created a "cat feeding station" with pet storage using two Ikea malm chests (The cats have to eat elevated so Amos cannot reach their bowls or we would have one FAT chihuahua on our hands and I absolutely refuse to have a fat chihuahua - I have seen too many at work. The good news is that their bowls really don't have to be that high to be out of Amos' reach.)
- dressed our windows with bamboo blinds and curtains (I'm waiting until the trim is white to decide if I like the tan color of the curtains or not. I originally purchased them for the master bedroom but I didn't like them in there so they ended up in the dining room. Time will tell if they stay here.)
- purchased and DIYed some art for the space
Still to do:
- paint the trim white
- find the perfect end chairs (which I think will sit on either side of the wooden buffet/hutch when not in use)
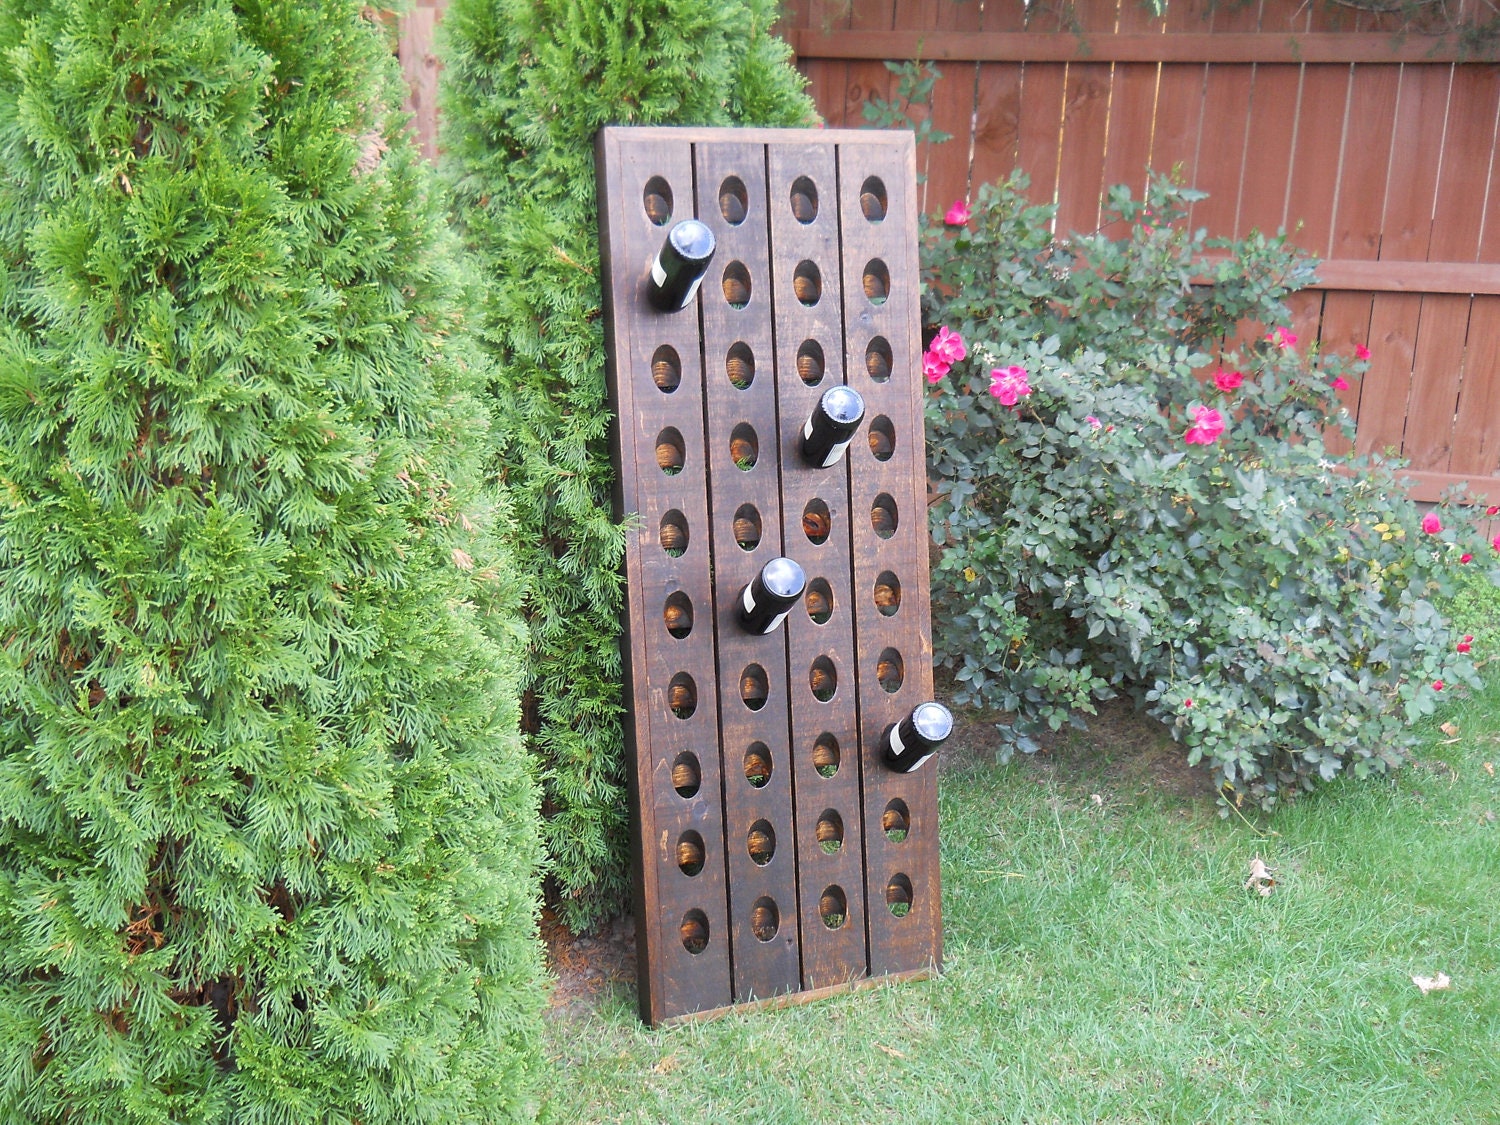
- DIY a riddling rack (like this)
- add more artwork around Robbie the rhino
- add art above the cat feeding station (I already have a long skinny frame)
- hang baskets above the buffet (I had them grouped on the wall like this in our old dining room)
- switch out the cheap Ikea floor lamp for something else
Office
(previously the dining room)


I would put this room at about 75% done. We have completed most of the "major" tasks.
We have:
- painted the walls (Benjamin Moore Sesame)
- repurposed our old living room rug (which I think works perfectly in its new home)
- set up our paper organization area
- replaced the overhead light fixture (we chose a smaller version of our dining room pendant for a bit of continuity)
- replaced all of the plugs, switches and their covers
- hung some art and small shelves
- created a small Auburn printable
- DIYed a cork board for collecting inspiration
- dressed our window with bamboo blinds and a pair of nice white curtains
- paint the trim white
- finish filling the upper shelf above my desk
- hang a small piece of art to the left of the window?
- unpack the boxes under Seth's desk
- purchase a nice brown leather desk chair for Seth (his current one is my old one from college and it's black; in case you couldn't tell his desk and the Ikea storage unit are both dark brown)
- paint the filing cabinet (it is distressed and cream right now - neither are really my thing)
- stock/organize/style the bookcase
- figure out a solution for the plug (check out the first pic - there is not a plug on the back wall where our desks are and it is an exterior wall which means mo' money than we're willing to spend right now for an electrician to run wires and install one - boo)
Kitchen


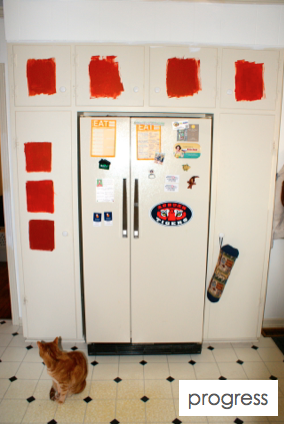


Pop quiz, hot shot - how many sample squares of paint did you spy on my cabinets? (Who knows what movie that's from before clicking on the link?) I went a little crazy in there but I believe I have finally made a decision (well, technically I've only decided on the color family, not the specific shade). You'll just have to wait until spring when it warms up and we decide to tackle painting the cabinets to find out what that color is. We are still in love with our chalkboard wall and use it all the time to jot down notes to one another, write reminders to include certain items on our weekly grocery list when we notice we're running low, and to greet our house guests with welcoming messages.
We are probably only 30% done in here. Remember, as much as we would love to gut the kitchen and reconfigure everything, we can't afford a full kitchen reno right now (which would likely be $20K+). We are going to try to spruce things up for around $3000 including the price of our new dishwasher and our hopefully soon-to-be-found new fridge (not including the new washer and dryer since they aren't normally involved in a kitchen remodel). Even if we were expert DIYers I think it would take $8-10K for our kitchen reno so I'm willing to put in a bit of money now to be happy for the next 4-5 years until we can save up enough for a full reno.
So far, we have:
- painted the walls (Valspar's Clean White WV31001; a Waverly color)
- created a giant chalkboard wall
- replaced the light over the eat-in area
- removed the fluorescent light over the sink and replaced it with a pendant
- purchased a new washer and dryer
- purchased a new dishwasher
- removed the scallop trim above the sink (visible in the first before pic above and missing in the progress pic just below it)
- purchased and installed a coat rack
- paint the trim white
- add blinds and/or curtains to the windows (I like the simplicity of this)
- p...a...i...n...t t...h...e c...a...b...i...n...e...t...s (had to say that slowly so I wouldn't get overwhelmed - I am dreading this job)
- replace the cabinet hinges and hardware
- fix the area above the sink where Seth removed the scallop trim (there is an opening into the bulkhead right now)
- figure out a way to store shoes at the back door (like this? but high enough to be out of Amos' reach)
- figure out how to enlarge the space for a new fridge without losing too much of our pantry storage
- install a backsplash? (I'm pretty sold on white subway tile with gray grout - it's cheap and classy)
- purchase new countertops? (cheap options include laminate or possibly Ikea butcher block)
- install a new floor (likely cheap-o peel and stick for now)
- purchase a table and chairs for the eat in area (I may have just blown the $3K budget)
- create a coffee station (like this)
- decorate!
Living Room


We spend most of our waking hours in our living room (when we're not at work) so I definitely want it to feel fun and represent our personalities well. Similar to the dining room, I had a difficult time choosing a paint color for this room (you can read about that here). I do like the color that I chose (Benjamin Moore's Woodlawn Blue) but some days I wish it were a bit more saturated. It's fine for now and I think once the room is more complete I'll like it more. This room is probably 40% complete.
We have:
- painted the walls
- painted the fireplace
- removed the top piece of wood on the far left built-in so that they are all the same height (the cream piece visible in the before photo above)
- sanded and primed the built-ins (but it needs to be redone because while I was sleeping Seth used the wrong primer and it scratches right off - sad day)
- created a gallery wall around the television
- purchased a new area rug
- purchased a new floor lamp
- purchased a new sofa
- purchased some new pillow covers and inserts for the sofa
- framed and hung Fred the moose (and then redecorated him here)
- replaced the outdated fan (visible in one of the pics above) with our dining room chandelier that we spray painted (I'm thinking it may end up in a guest bedroom one of these days)
- organized our broom cupboard
- replaced the switches, plugs, and covers
- replaced the knobs on the built-in doors
Yet to do:
- purchase new seating (definitely a couple of chairs and maybe a chaise)
- purchase end tables (I've been searching with no luck thus far)
- purchase a new coffee table (again - can't find what we want, in the height we need, in our budget yet)
- wall decor for above the sofa (I've already purchased something but it needs some attention first)
- plan for the empty corner next to the television including the wall to the left of the fireplace (we have some ideas)
- re-prime built-ins and paint
- fill and style built-ins
- paint or replace knobs on built-ins
- dress windows with curtains +/- blinds
- install fireplace mantel
- style fireplace mantel
Whew. We have definitely accomplished a lot, but still have so much left to do. I am proud of the fact that I am taking things one day at a time with this house. With our first house, I rushed to get everything just the way I thought I wanted it (I'm sure I will always be tweaking something) and didn't really stop to enjoy the process. I'm trying to remedy that this time around and it seems to be working. Stay tuned for part two of this update.
What do you guys think of our progress? Do you get impatient with home improvement/decorating projects or do you let them slowly evolve and savor every moment?